TunnelVision
See exactly what your iPhone is talking to — a network monitor that runs entirely on your device. No jailbreak, no computer, nothing ever leaves your phone.
TunnelVision shows you every connection your iPhone makes: which apps reach which servers, on what ports, and how much data they move — live, as it happens. You can follow a connection all the way down to the individual packets and their raw bytes, and save any capture as a standard .pcap file. All of it happens on the device; there is no server behind TunnelVision and no account to create.
It is also a tool for auditing what one app sends. Record a named session per version and build of the app you are assessing, mark the moment consent was given, and export what the network showed as a bundle of evidence — a capture, structured records, and a report laid against the network requirements of BSI TR-03161, the German technical guideline for health apps. More on that below.
Not on the App Store
TunnelVision was finished, submitted, and reviewed on 28 August 2026 — and rejected under Guideline 5.4, which requires that any app shipping a packet tunnel come from a developer account registered to a company, not an individual. Nothing was found wrong with the app: not its privacy, not its behaviour, not its design. Capturing traffic on iOS is only possible through
NEPacketTunnelProvider, and shipping one makes you a “VPN app” in Apple’s classification even when, as here, the tunnel ends on your own phone and there is no server anywhere.So it is published here instead, under the MIT licence, in full. You can read exactly how it handles your data, and you can build it and run it yourself. The whole story is in docs/APP-STORE.md.
See it
 |
 |
 |
|---|---|---|
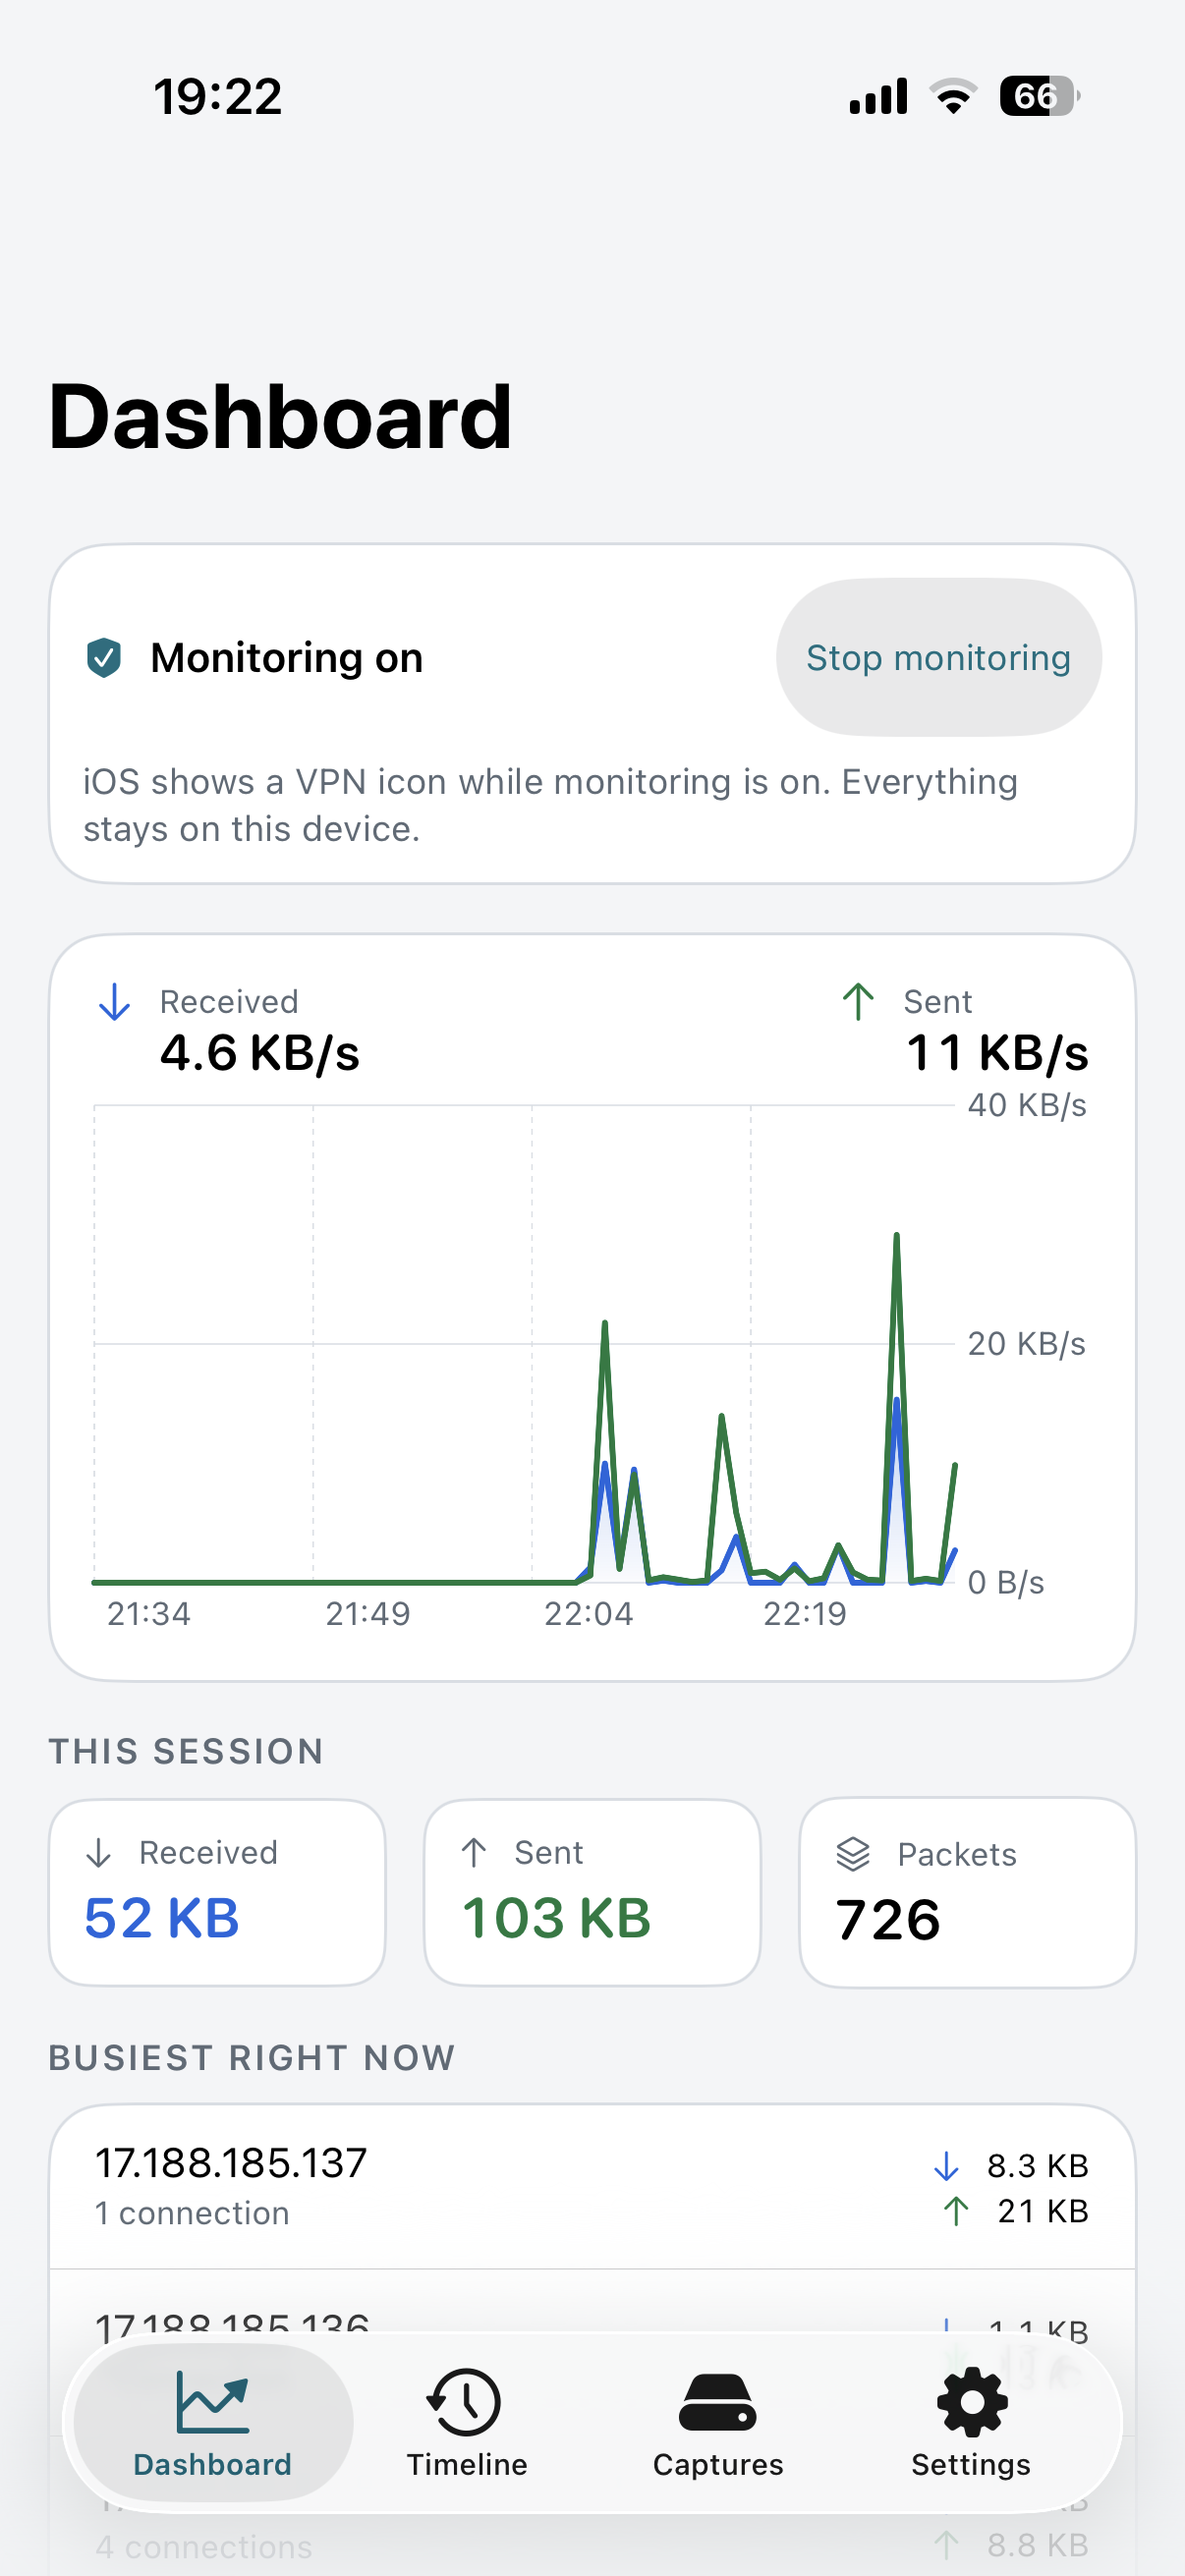
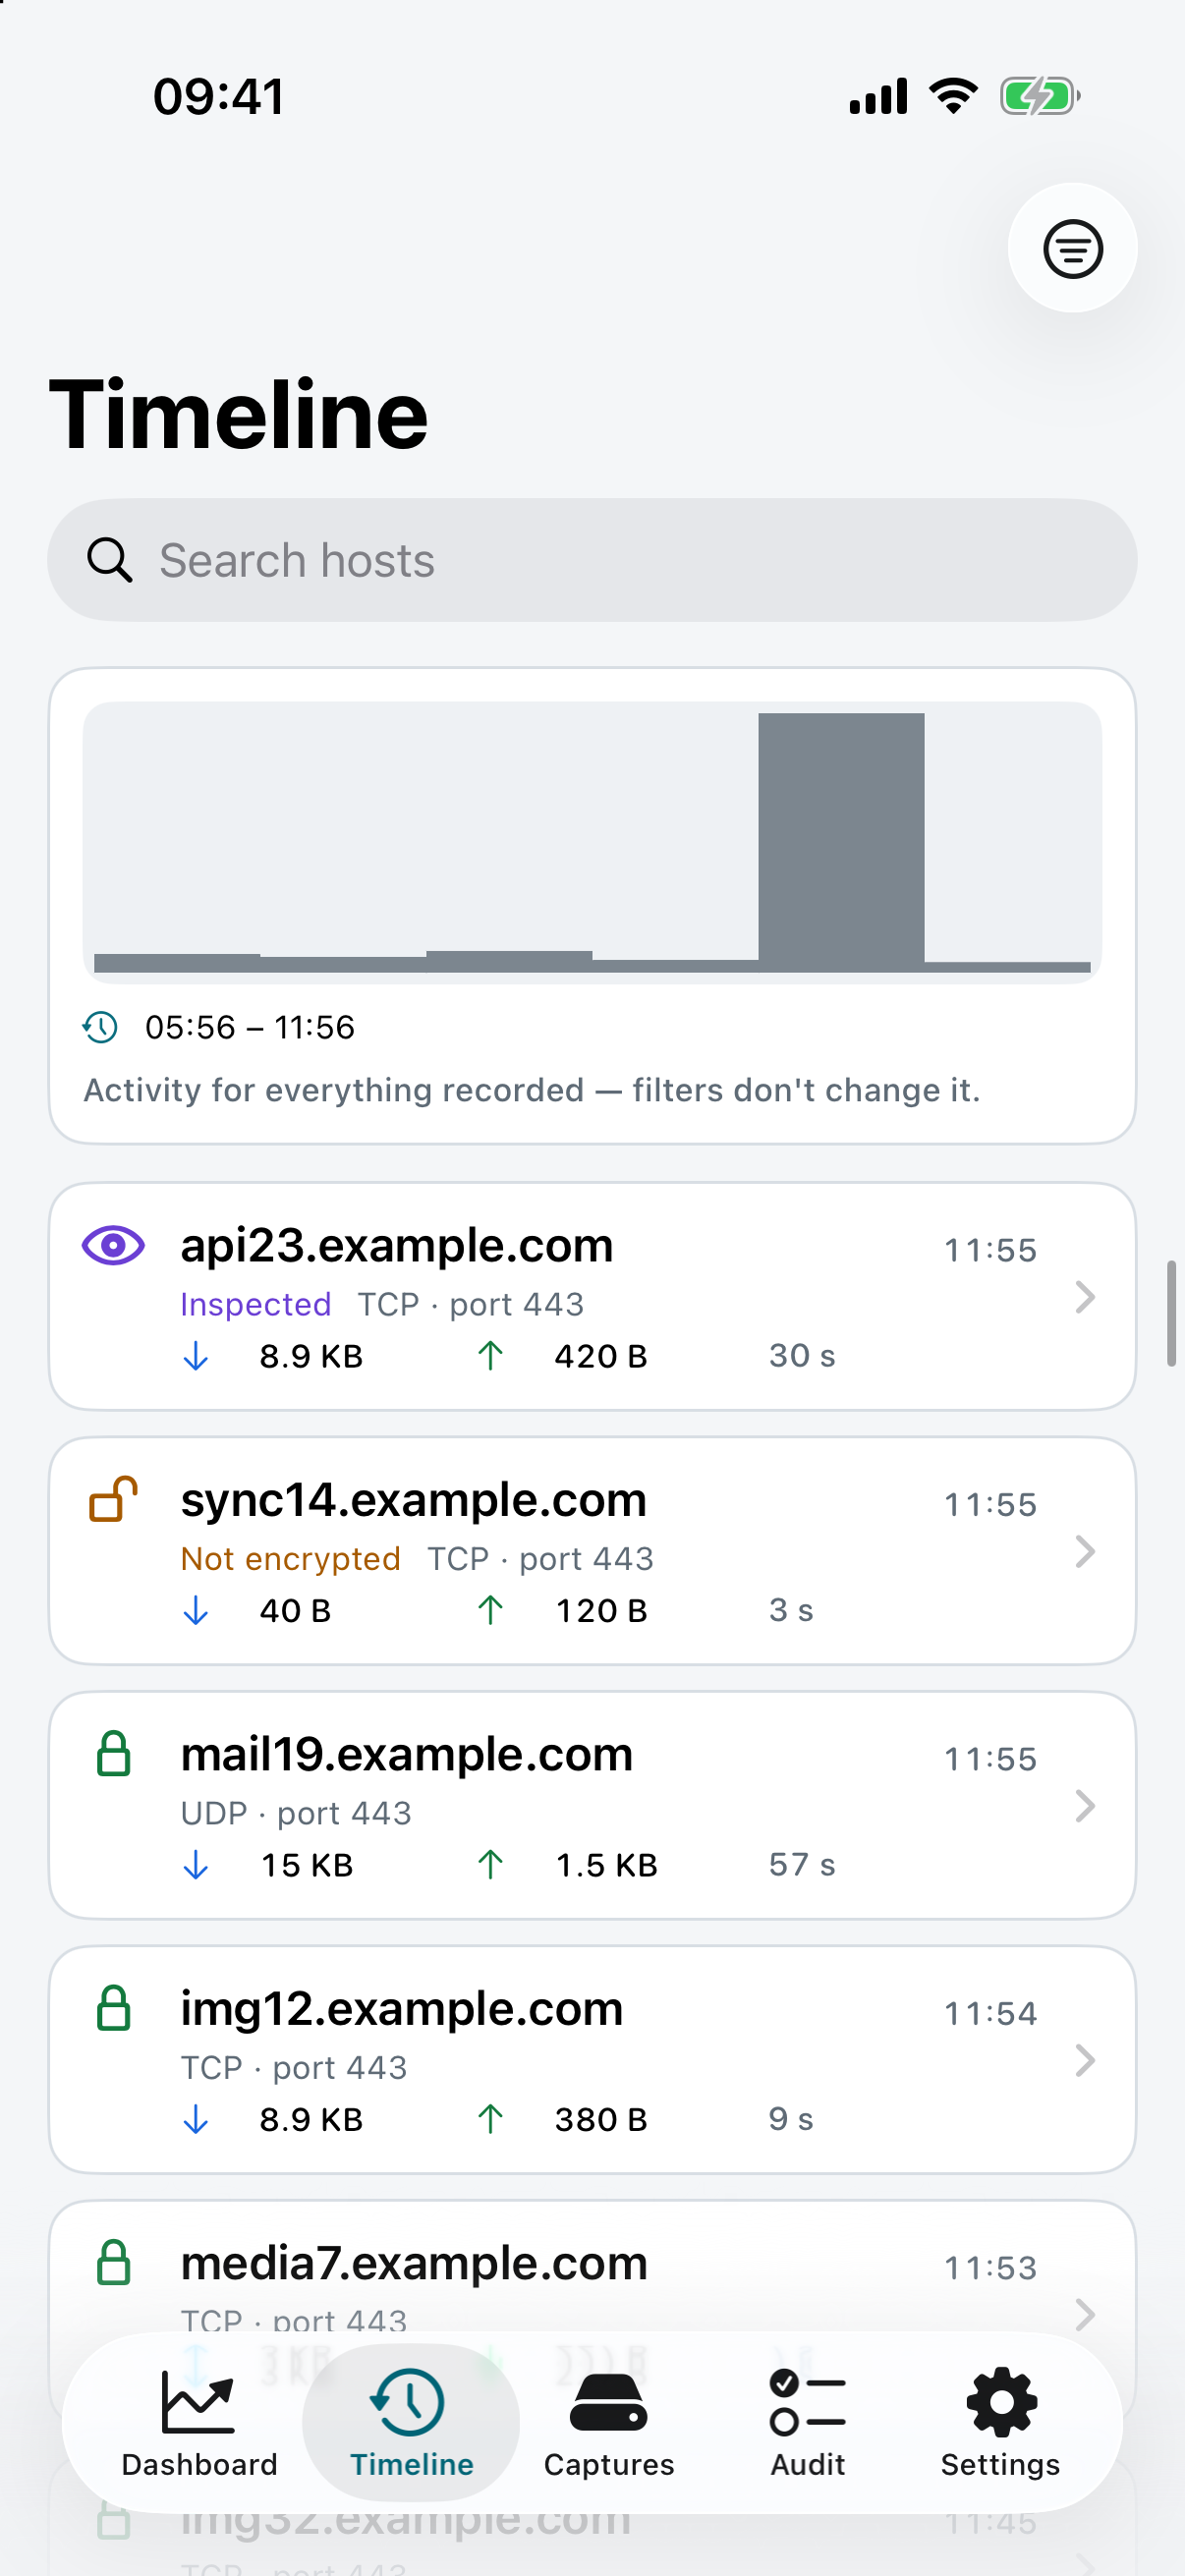
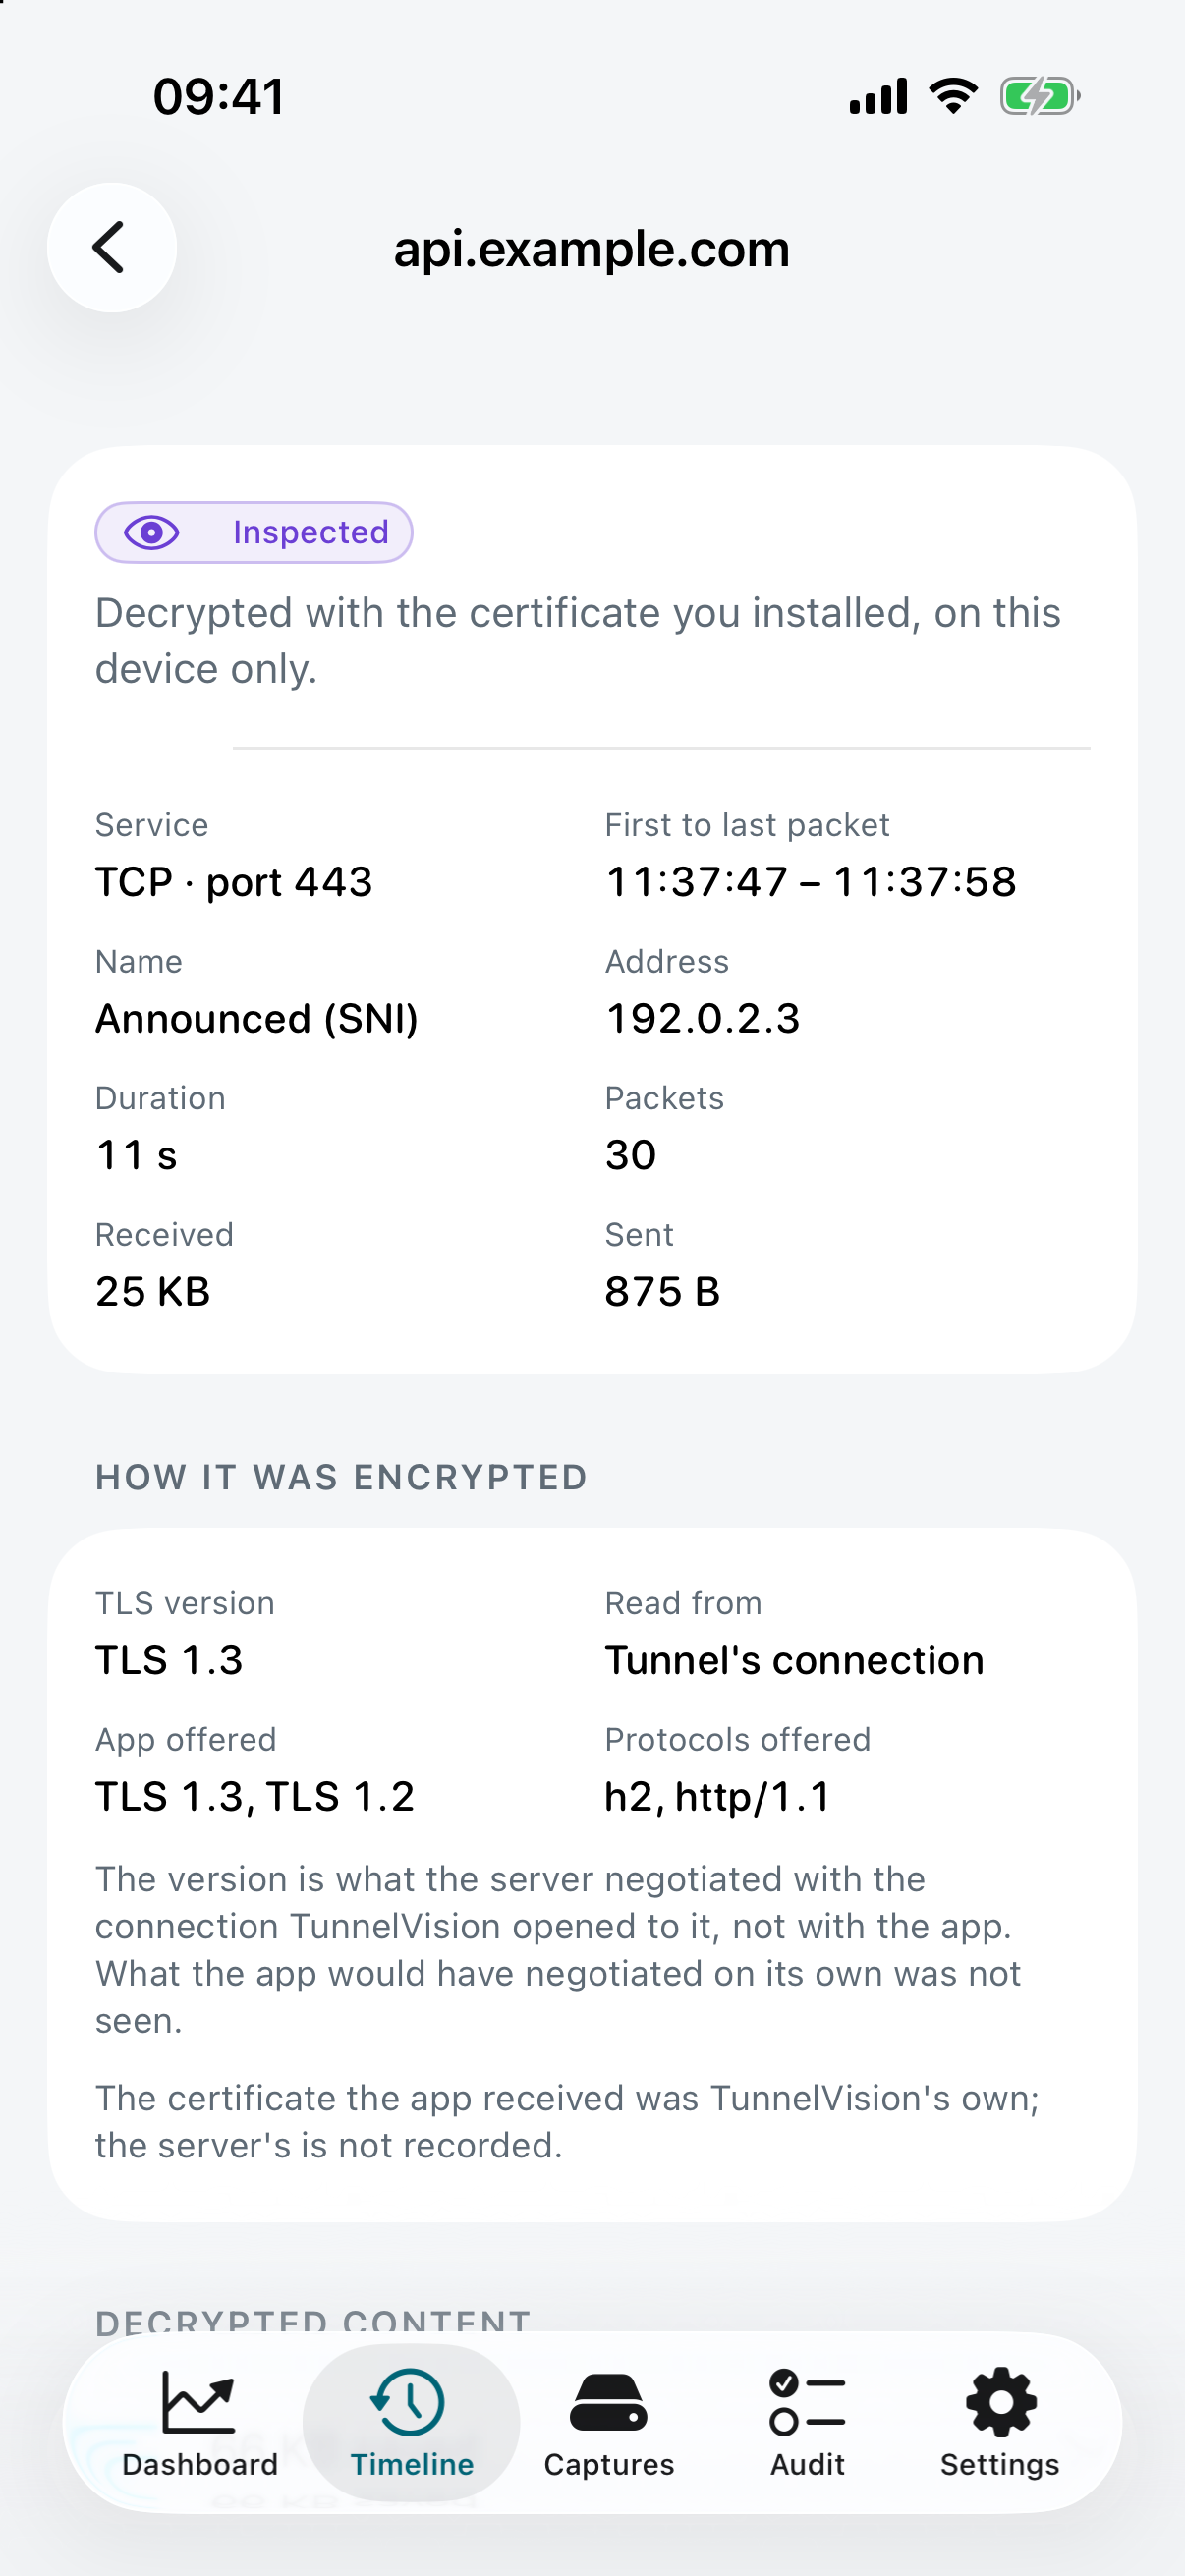
| Live traffic, in and out, and who is talking most right now | Your history, newest first, and whether each connection was encrypted | One connection: how it was encrypted, with its packets underneath |
 |
 |
 |
|---|---|---|
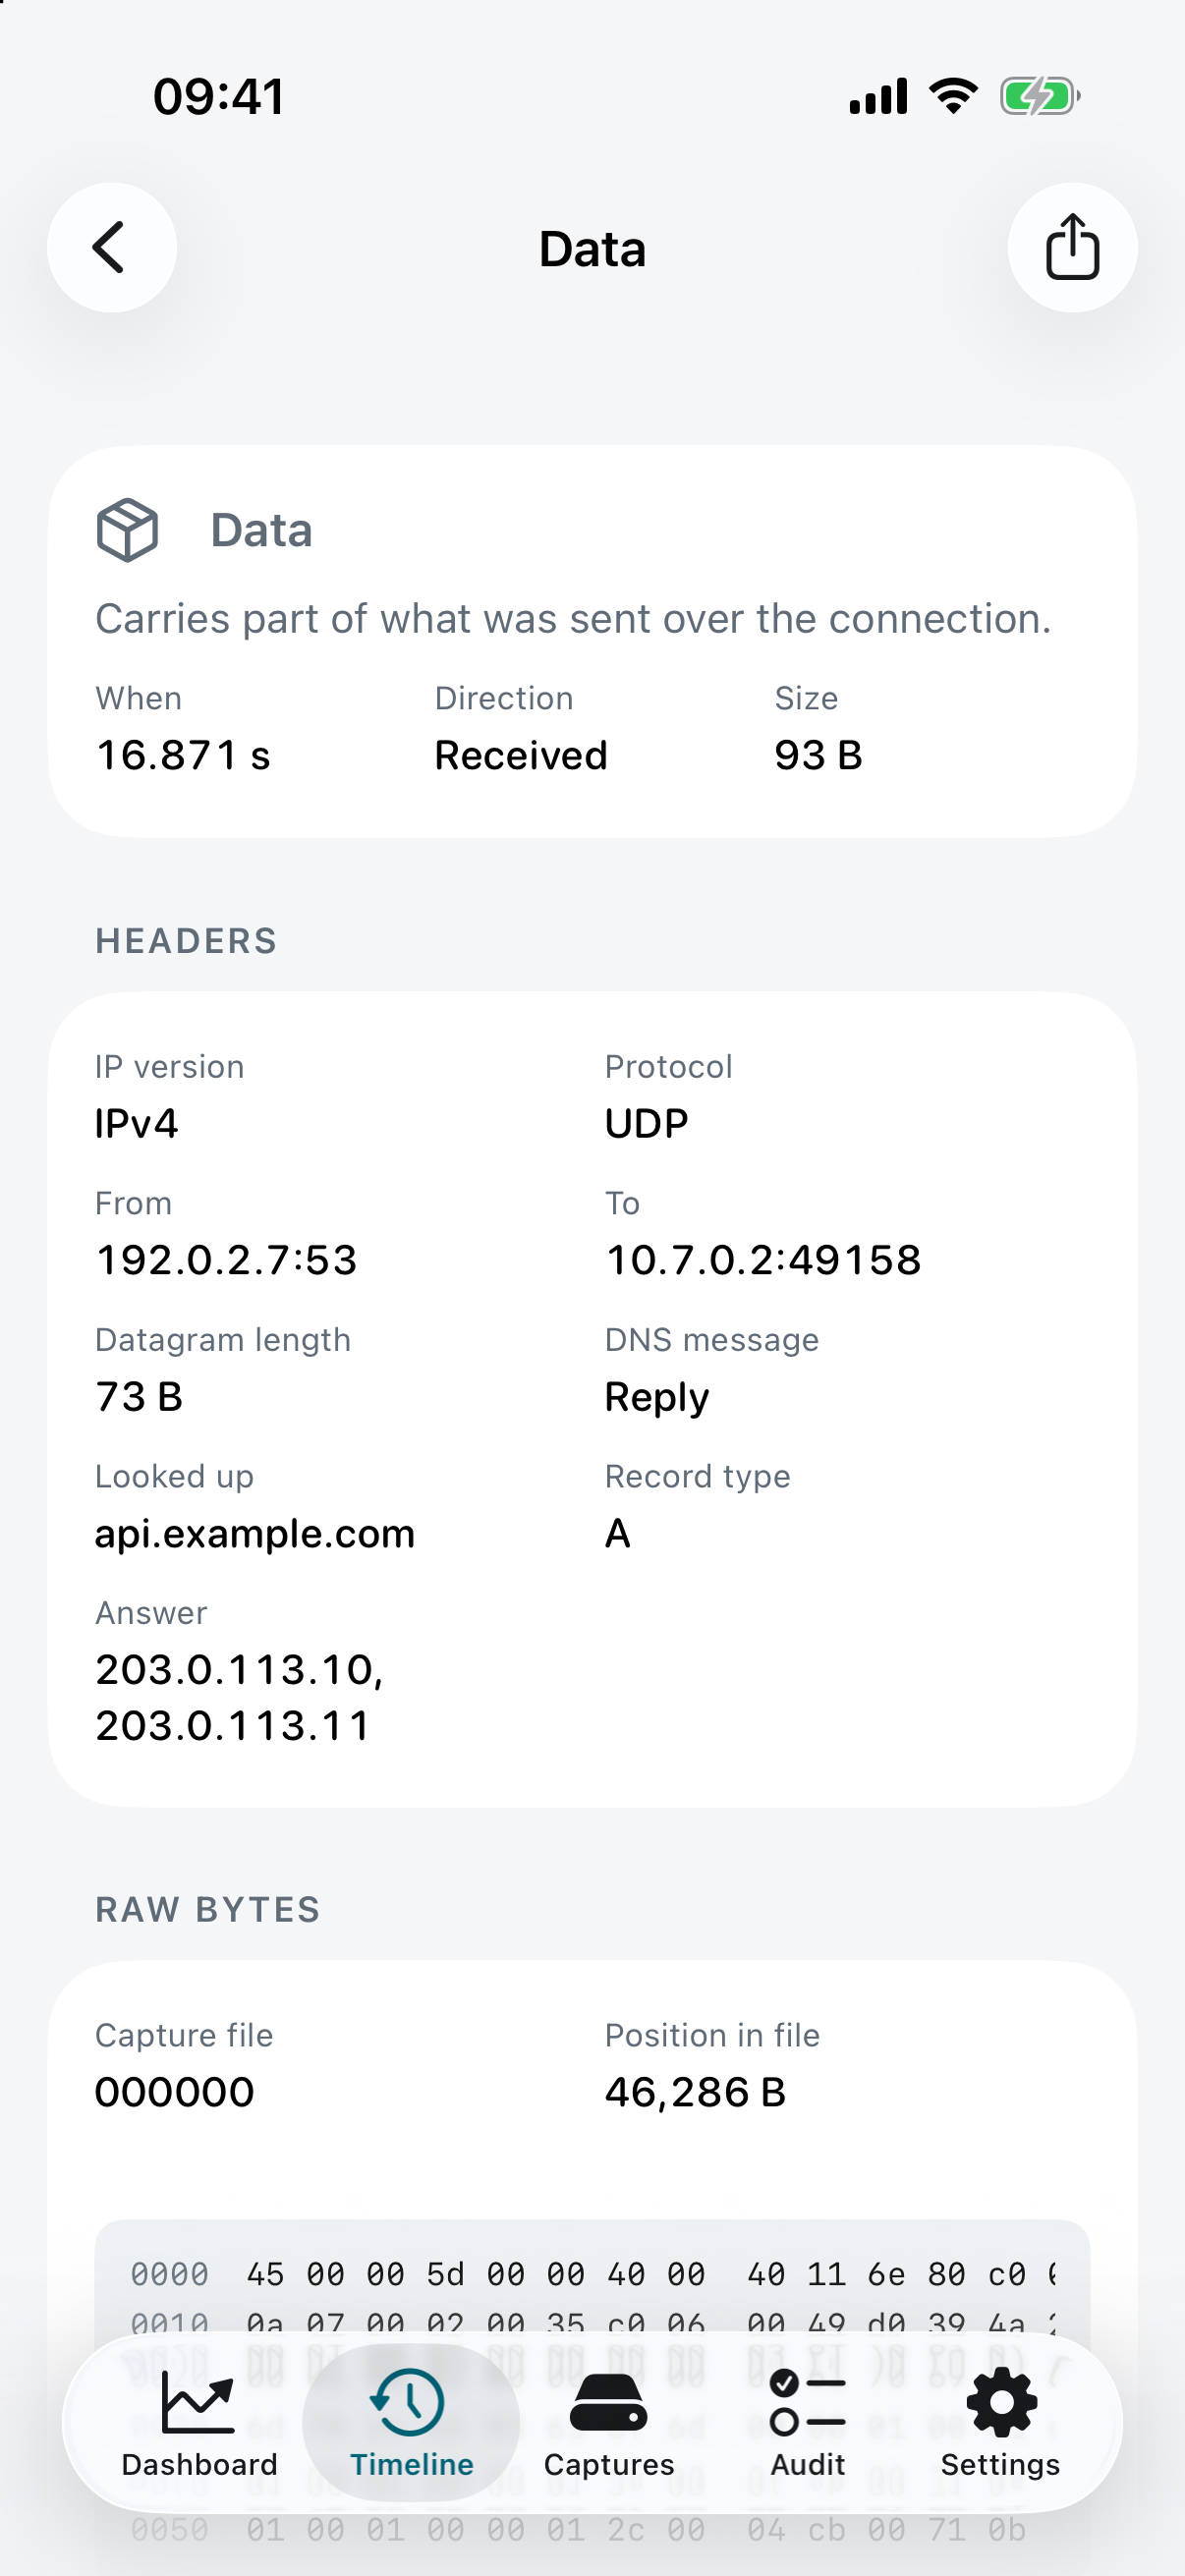
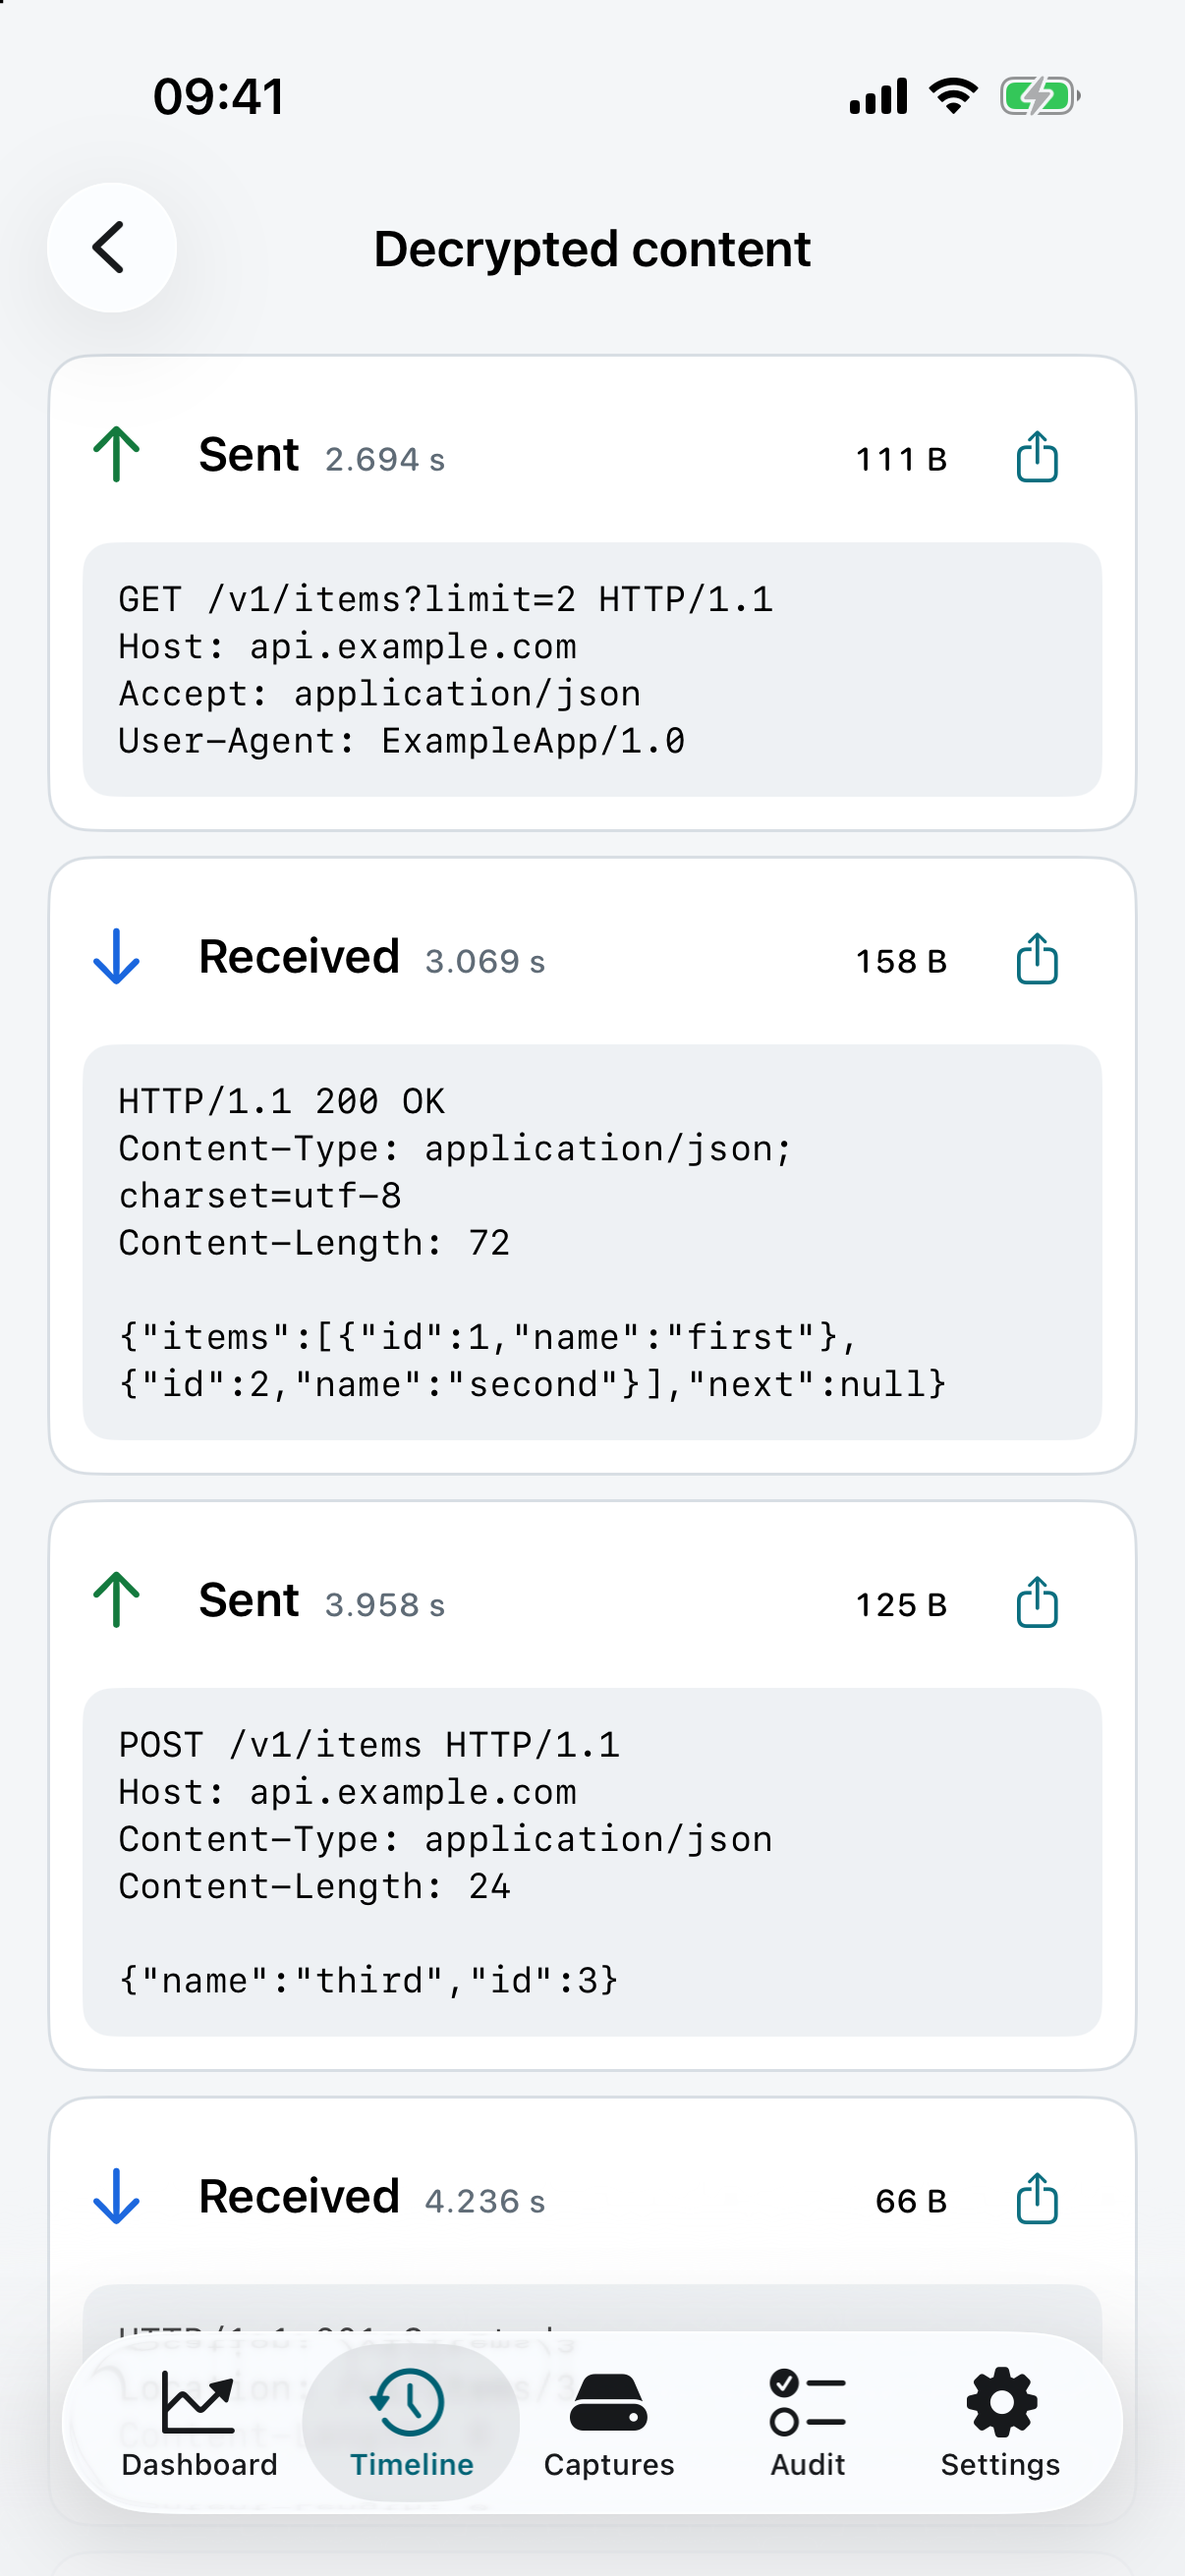
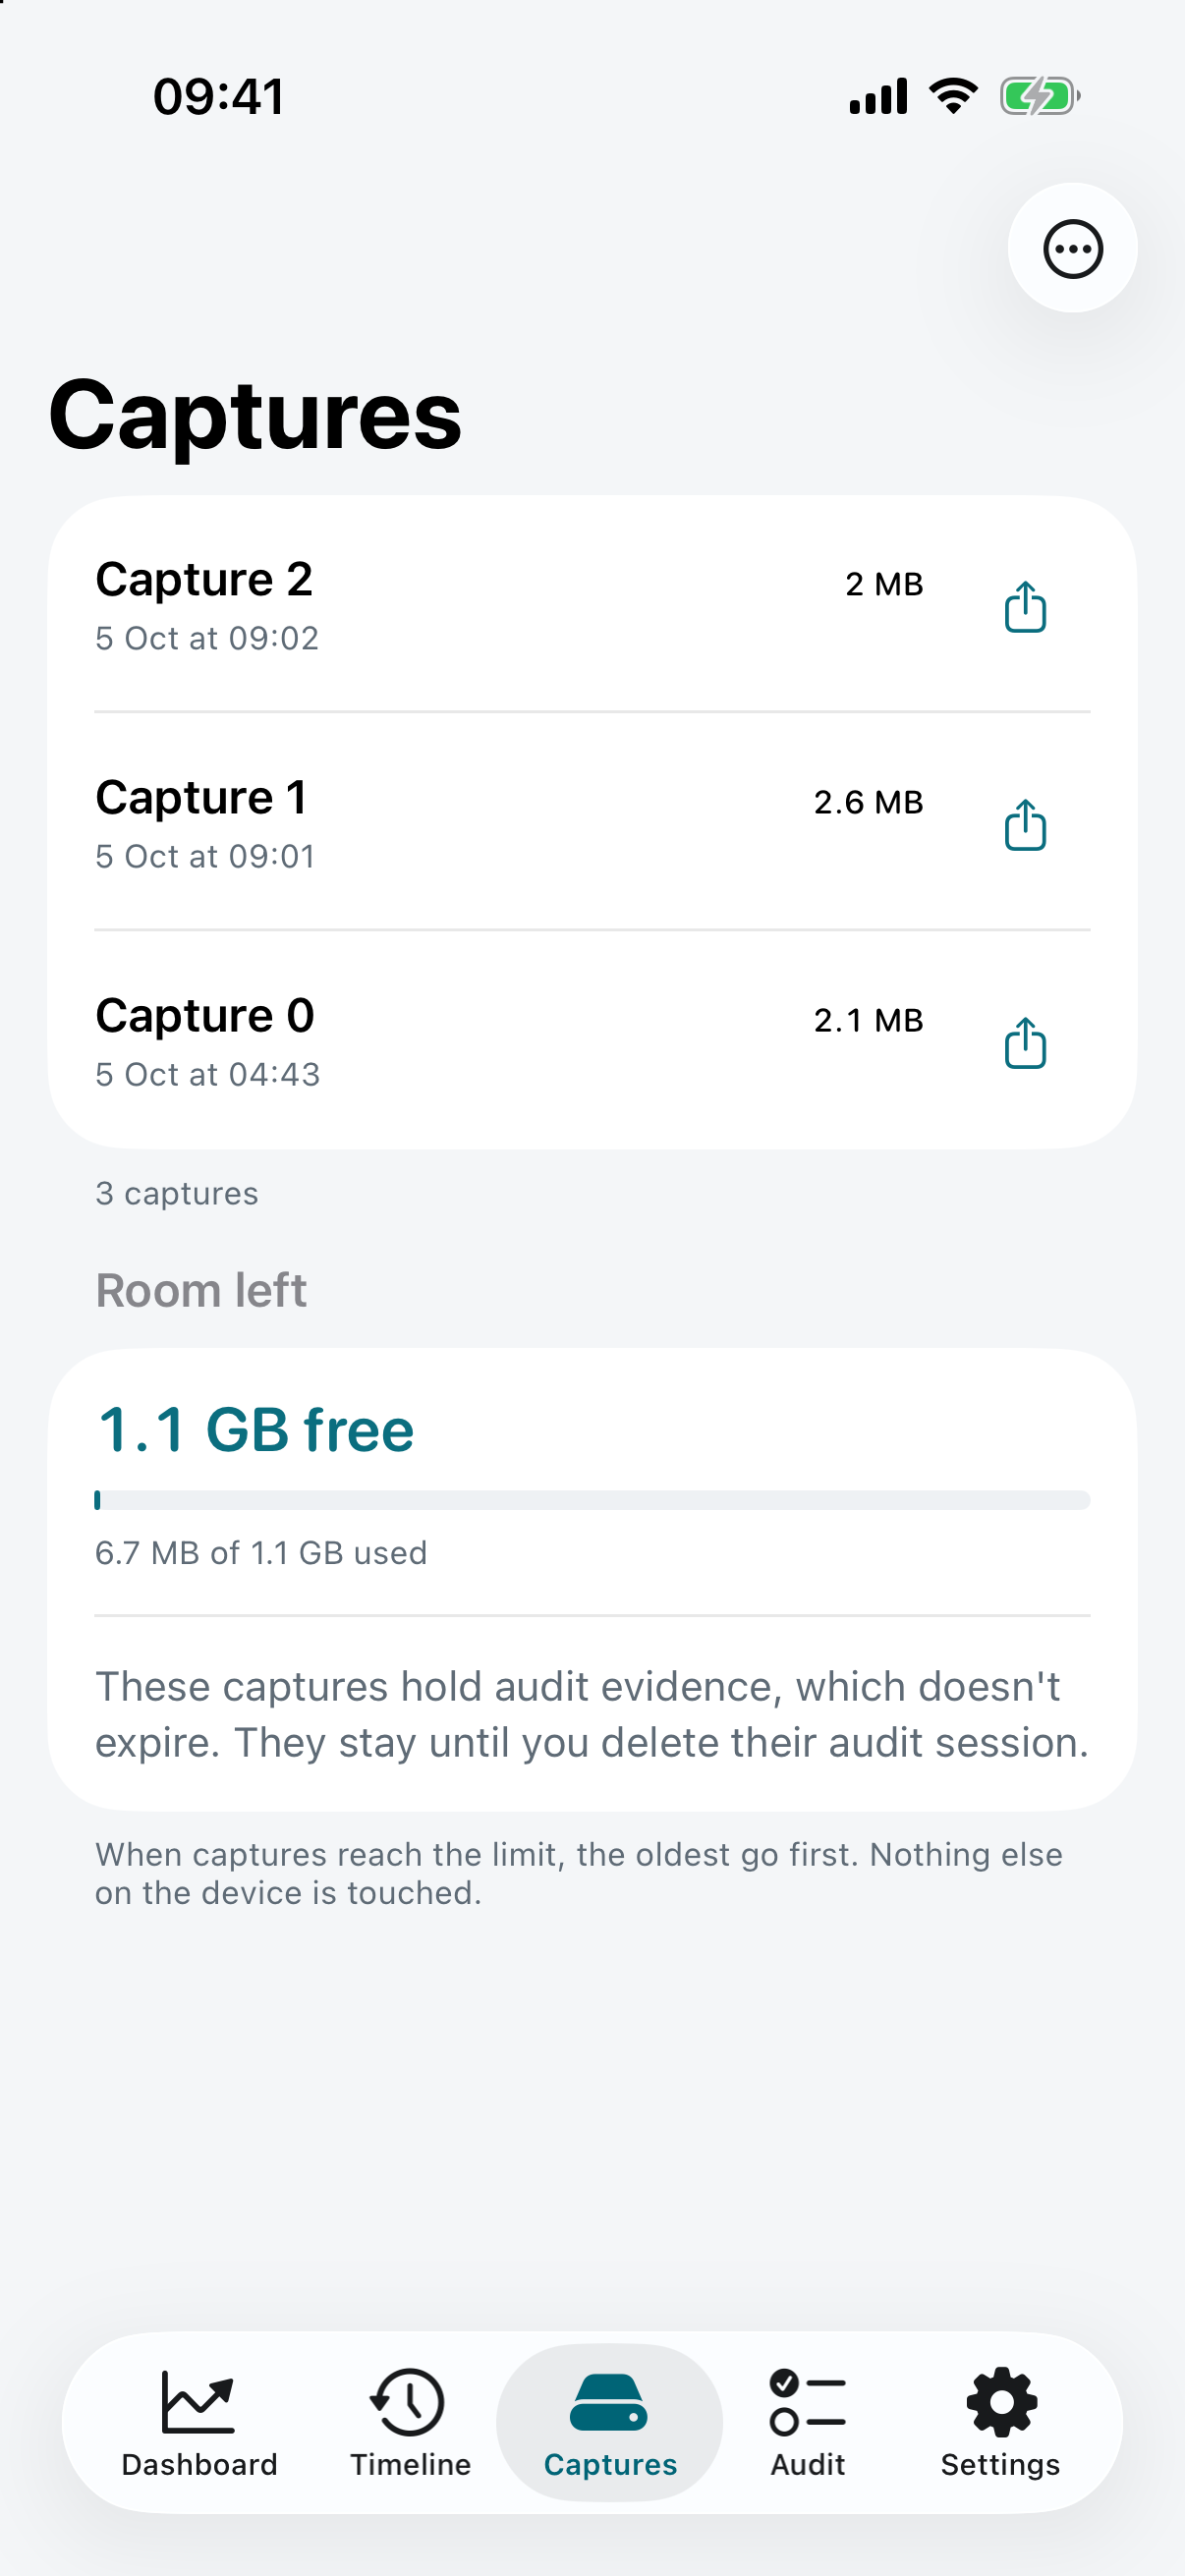
| One packet, headers decoded — here a DNS reply, with the name looked up and the answer | Inside your own HTTPS, turn by turn, when you switch it on | Your capture files, and whether they are going to fill your phone |
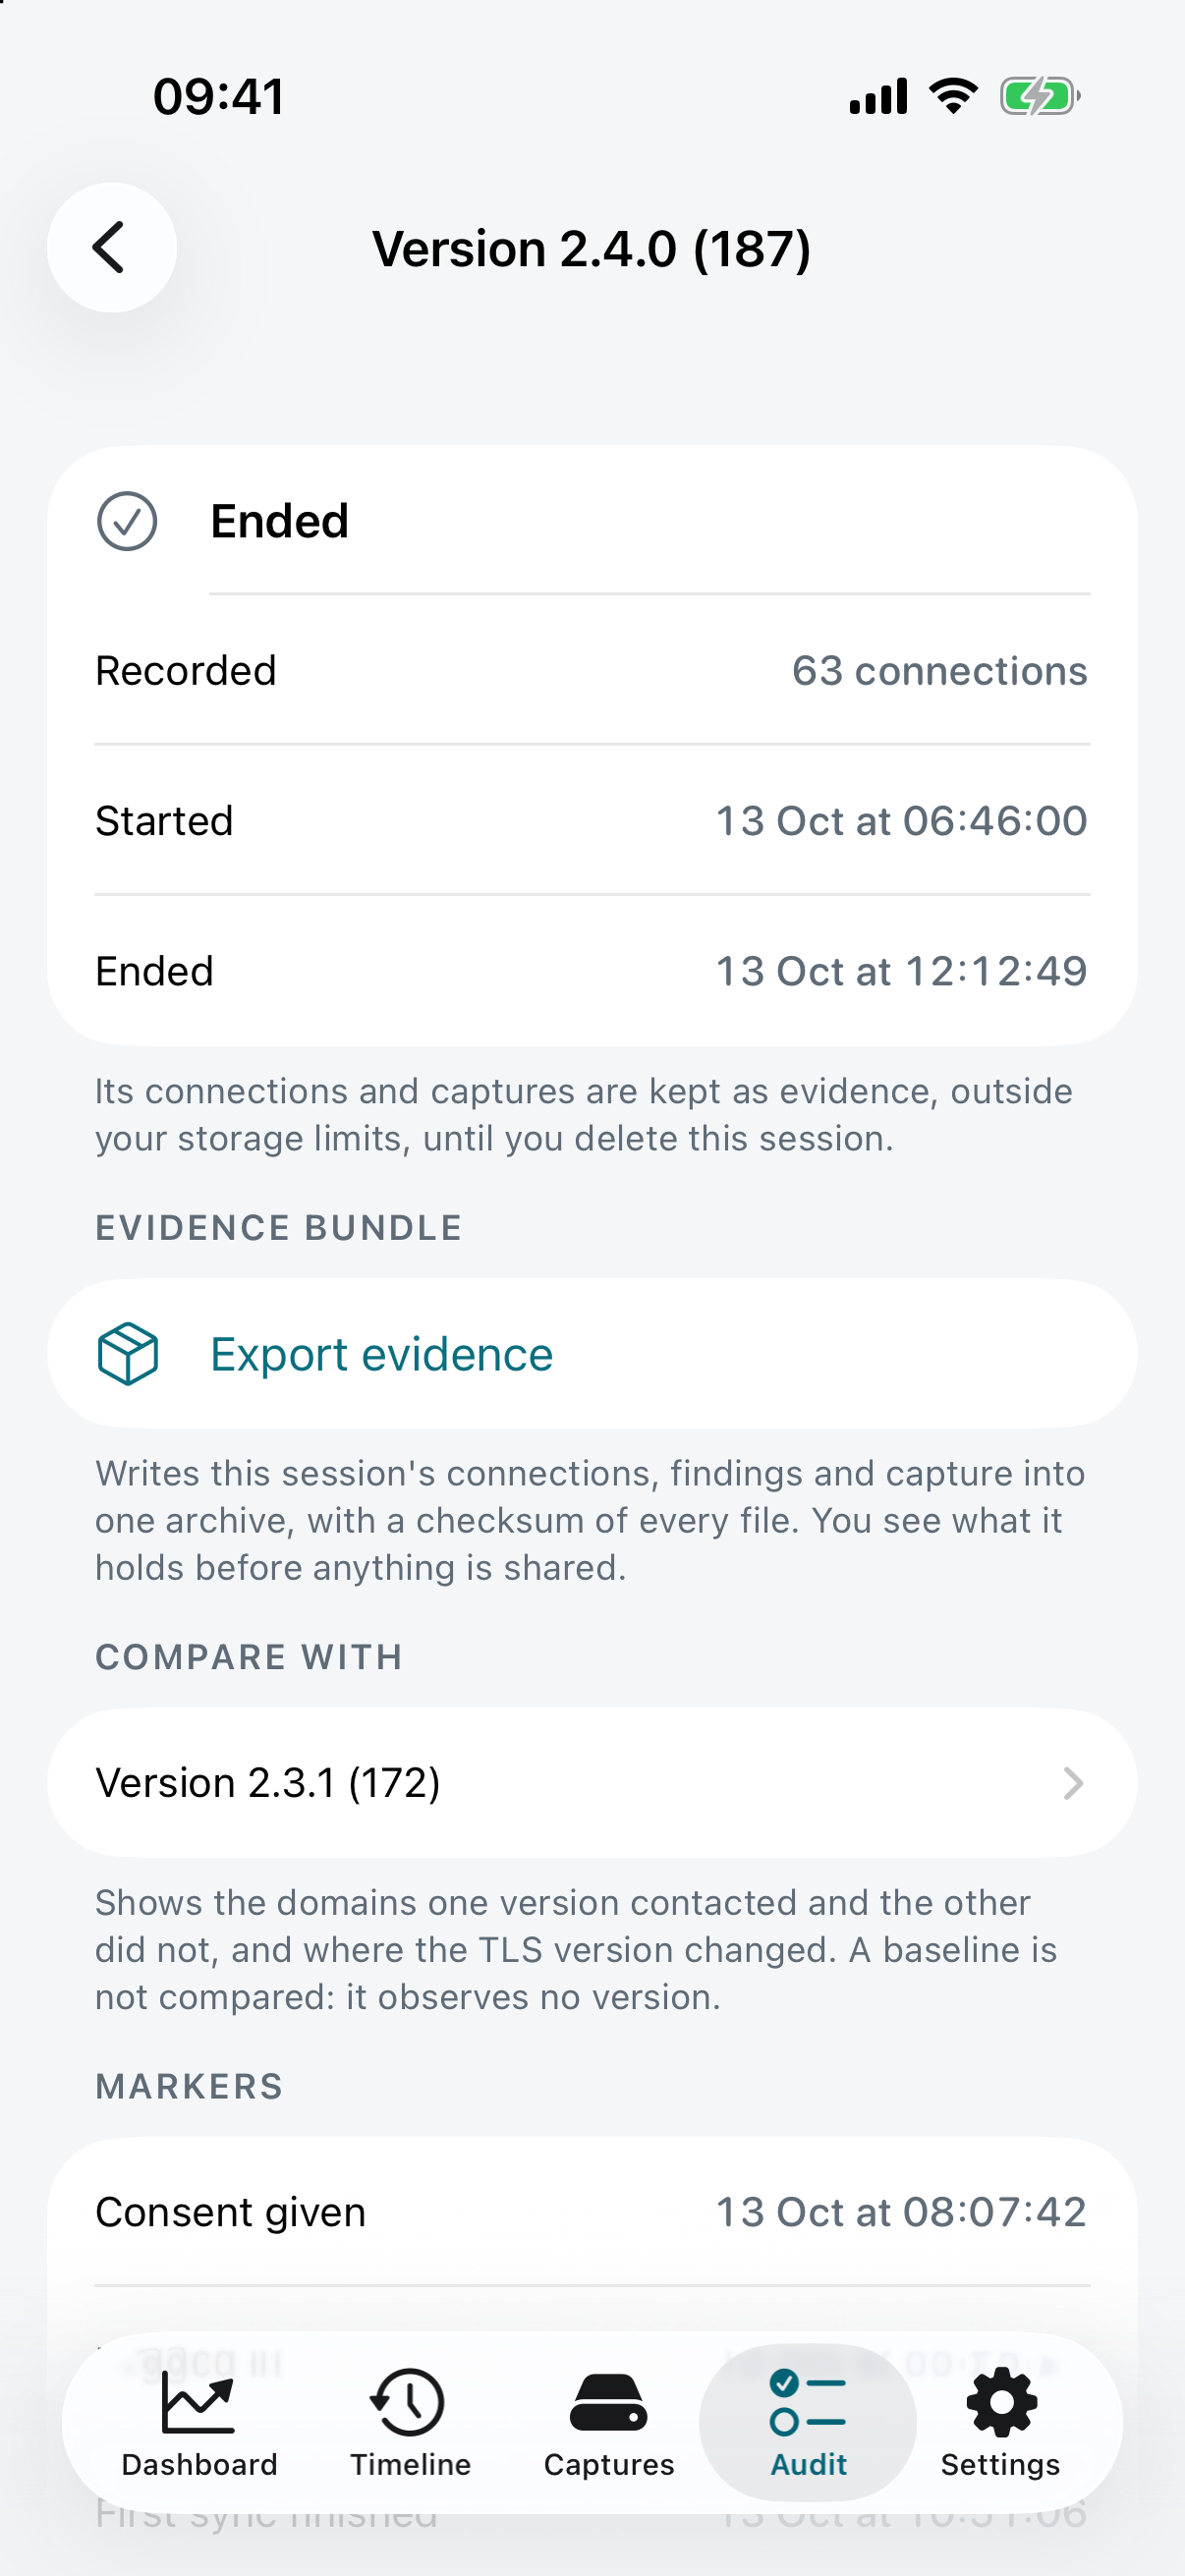
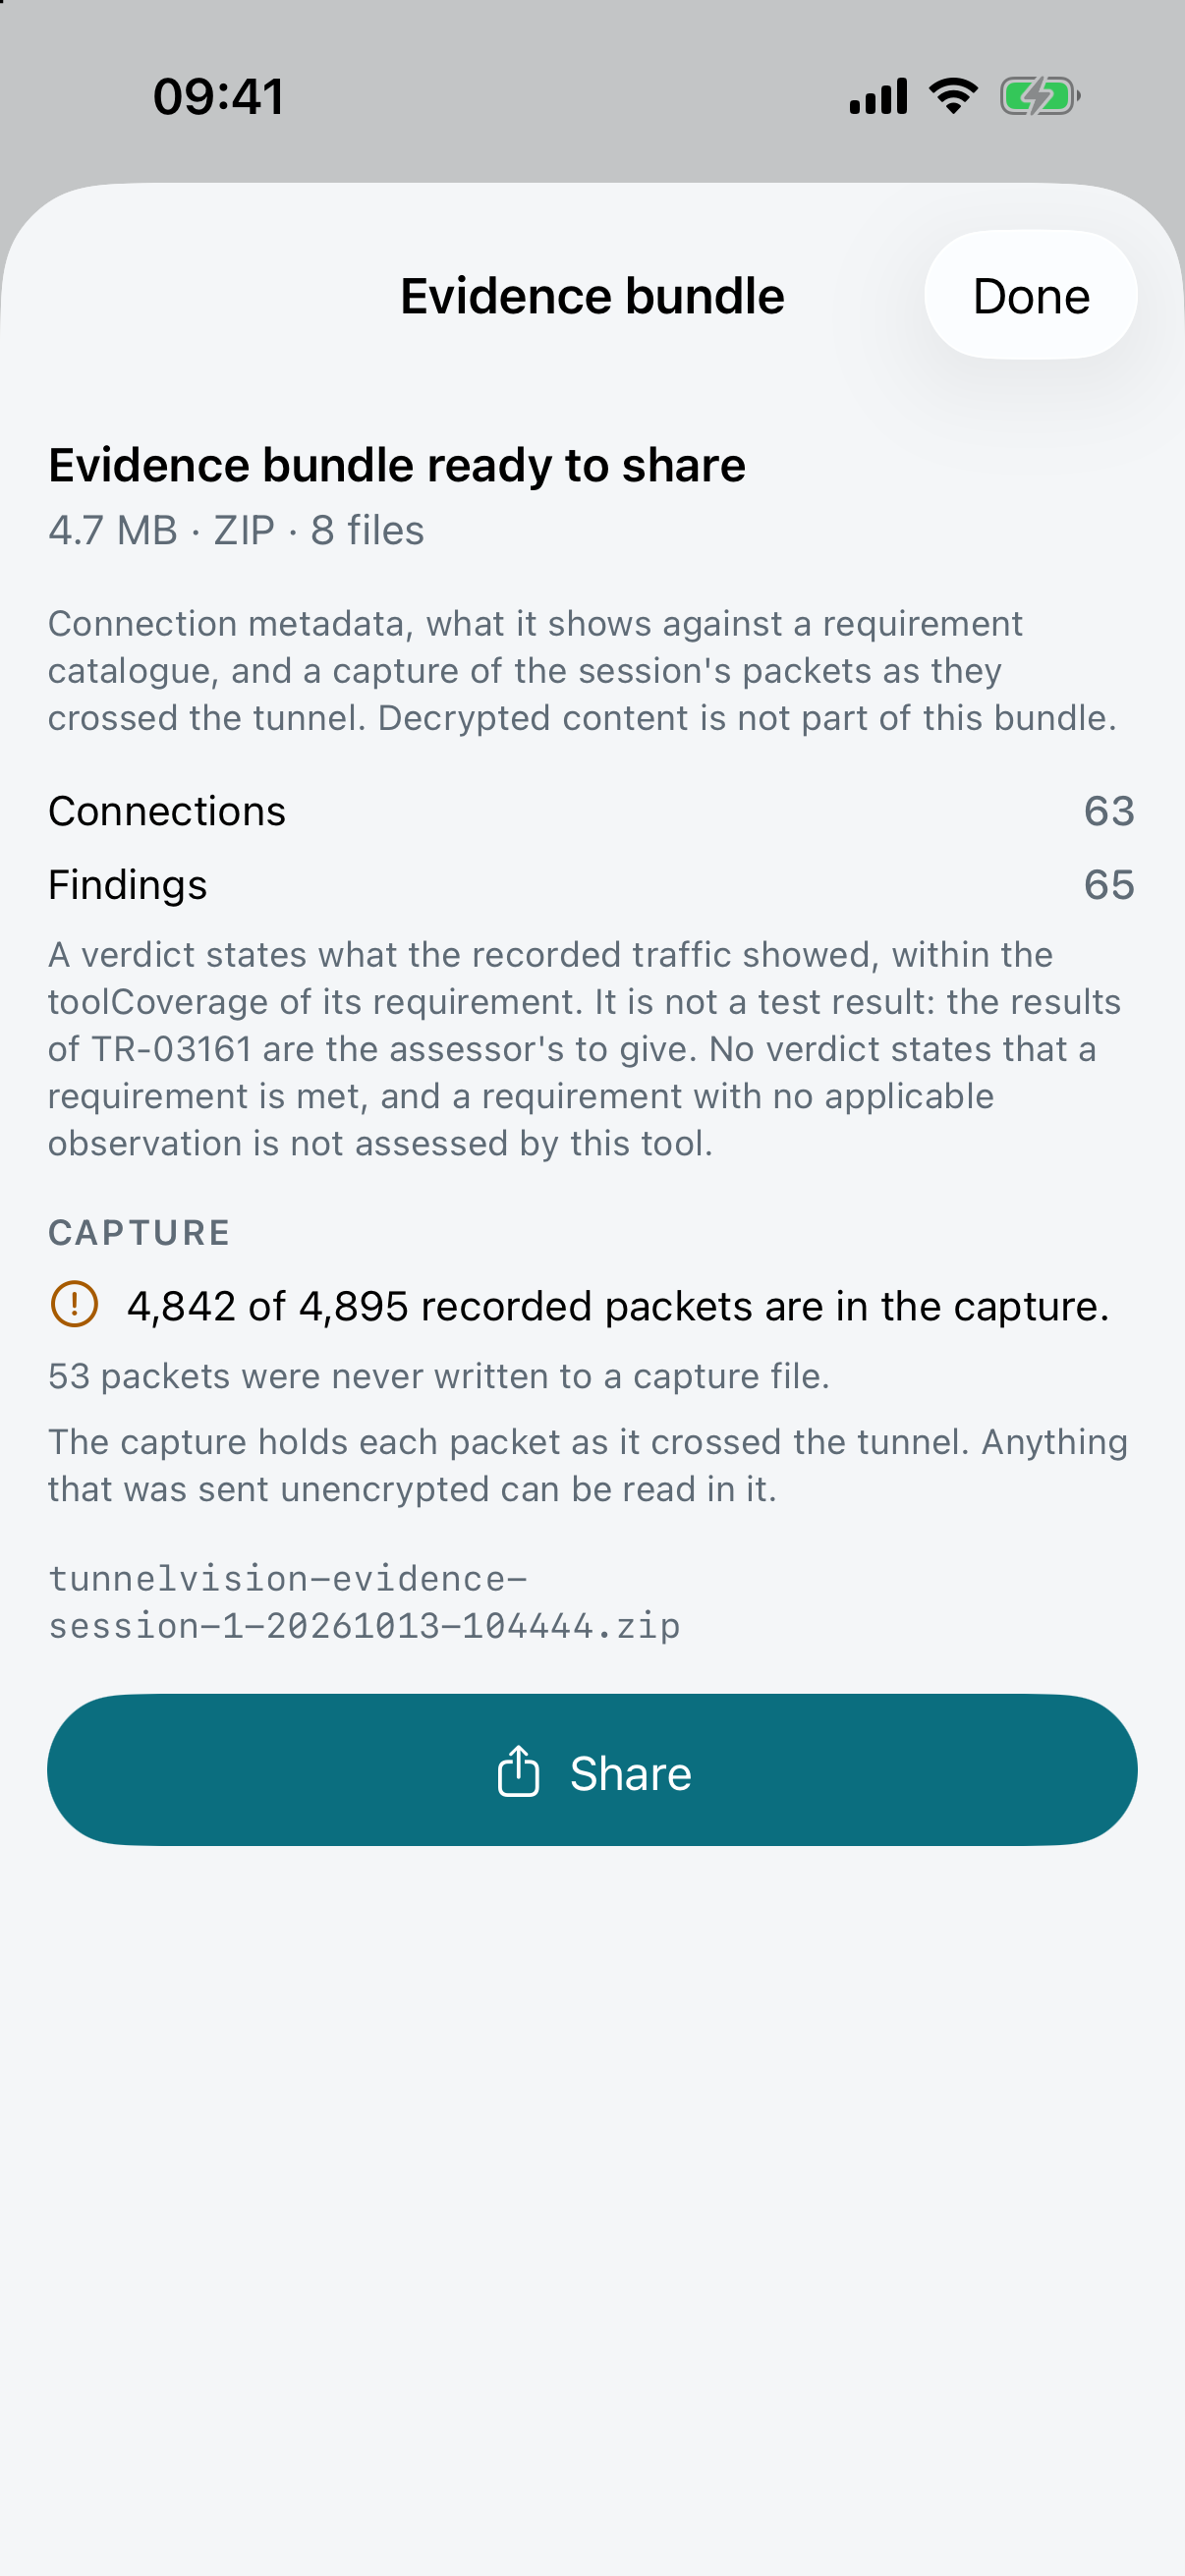
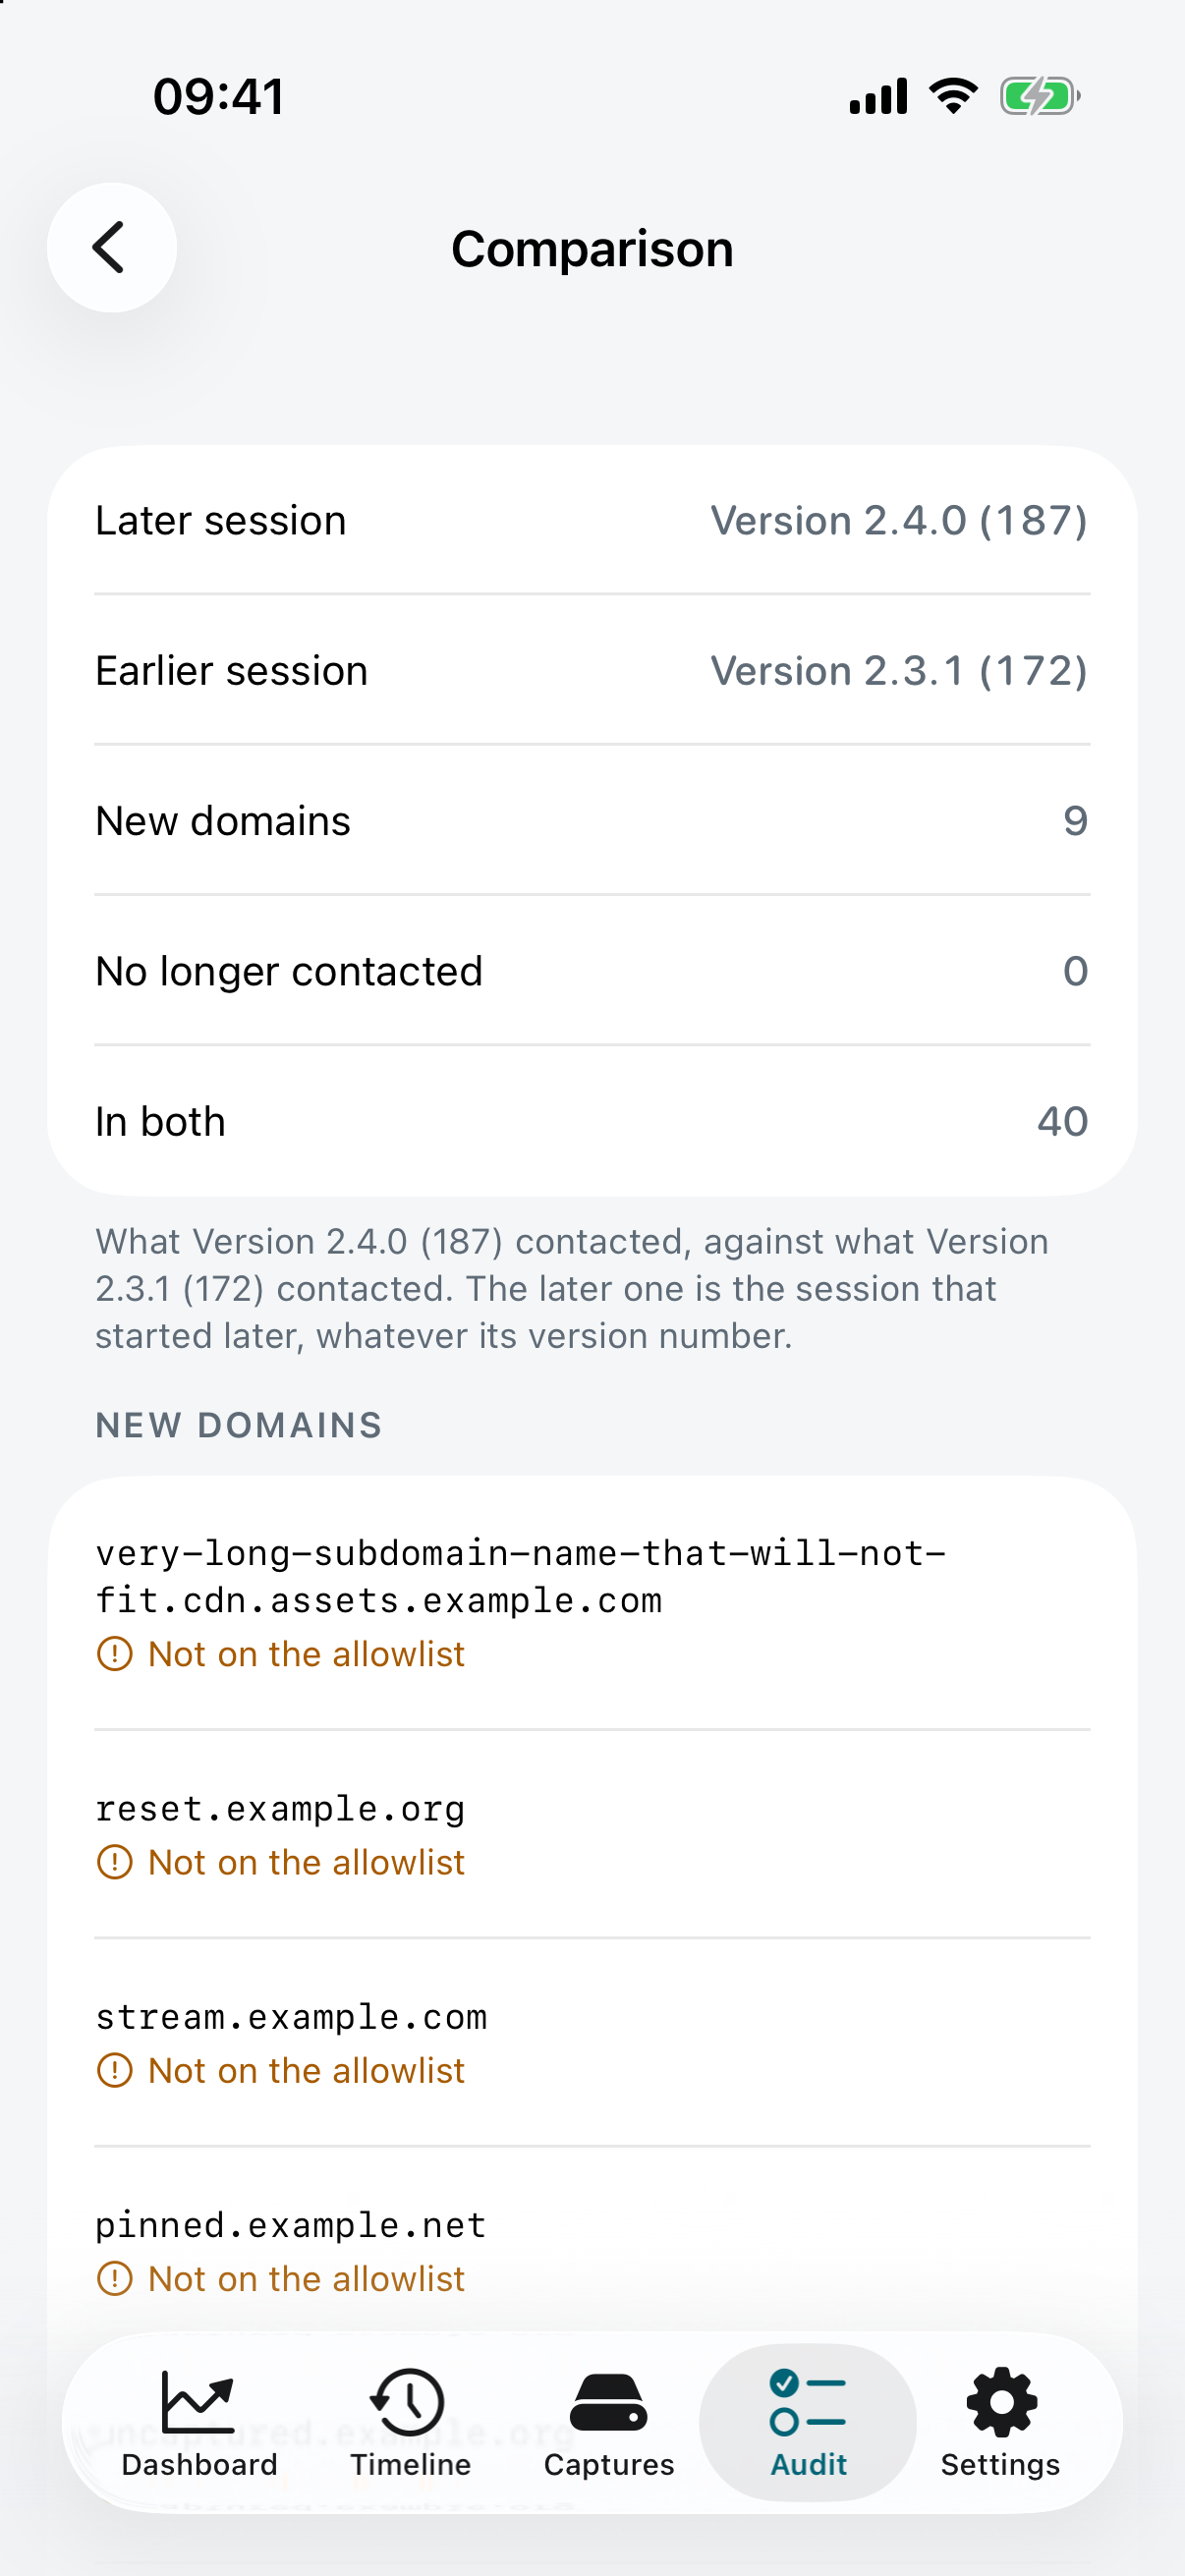
And the audit side — a session of one app version, what its evidence bundle holds, and that version against the one before it:
 |
 |
 |
|---|---|---|
| An audit session, named after the version and build it observed | Its evidence bundle, and what is and is not in it, before anything is shared | Two versions compared: what the newer one contacts that the older did not |
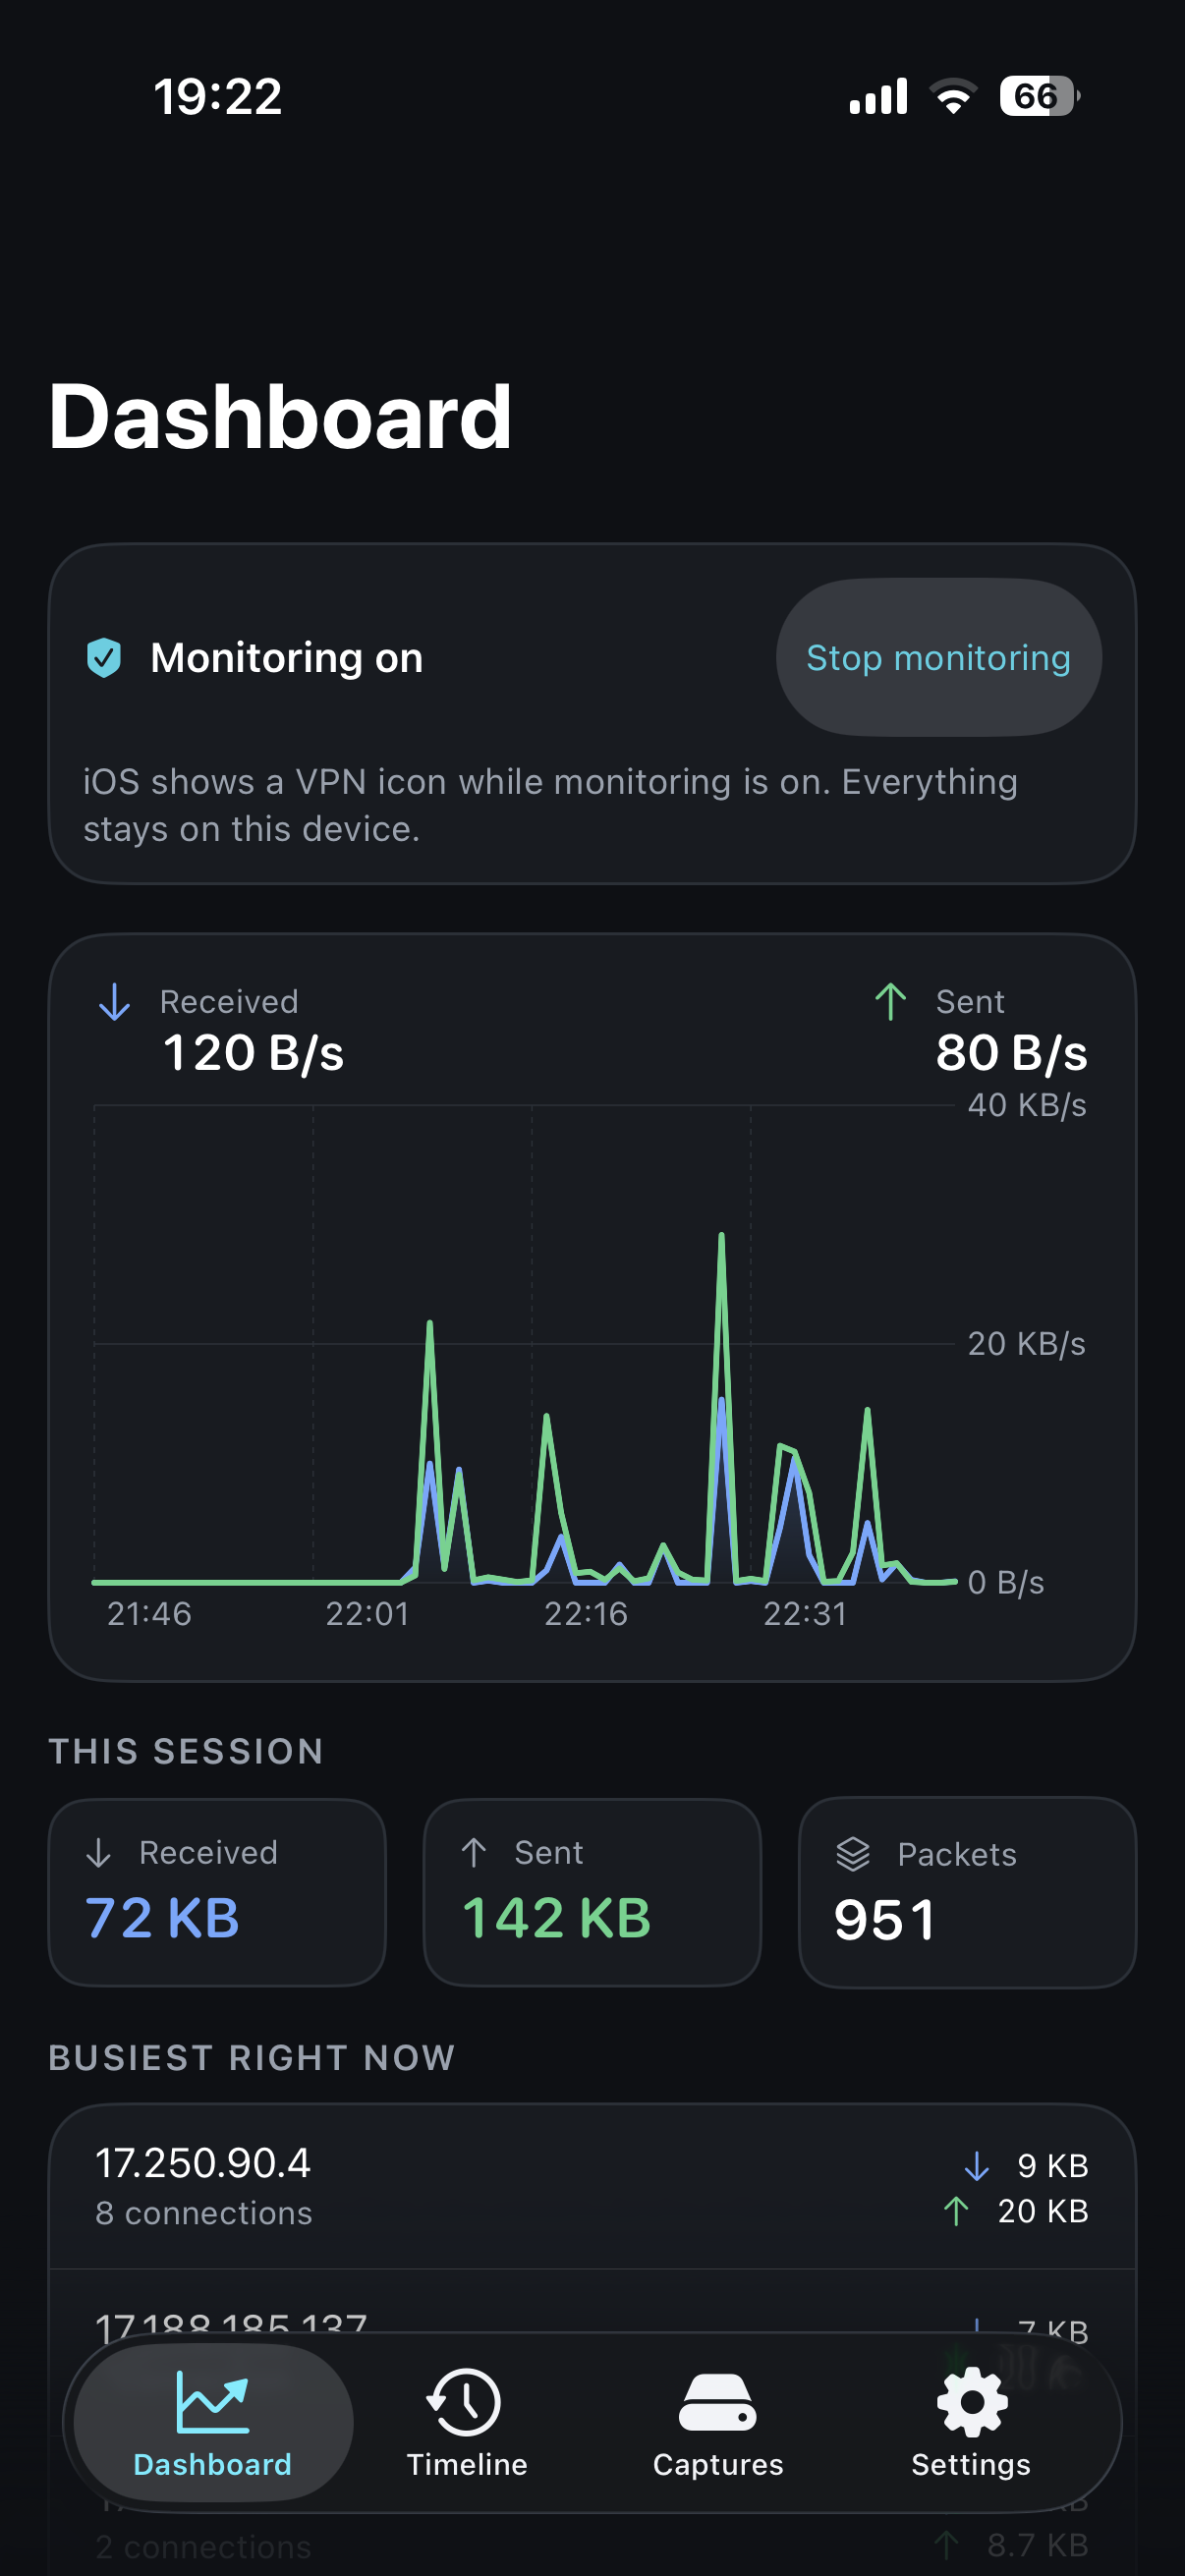
TunnelVision follows the system appearance, so all of it comes in dark too:
Your privacy comes first
TunnelVision is built to inspect your own traffic, and its design deliberately stops there:
- Nothing leaves your device. All capture, storage, and analysis stay in the app. There is no cloud, no account, and no upload — TunnelVision has no server to send anything to. The only time a file of yours can leave is when you share a capture, and the app tells you what is inside it before the share sheet opens.
- You are always in control. Monitoring only runs while you have the tunnel switched on, and iOS shows the standard VPN indicator the whole time.
- Looking inside HTTPS is opt-in. Reading encrypted traffic is off by default. Turning it on requires you to install a certificate on your device — a deliberate, reversible step, guided screen by screen inside the app, and undoable from the same place.
- It won’t break other apps. Apps that pin their certificates simply stay private and are shown as not inspectable. TunnelVision respects other apps’ security and never tries to defeat it.
Every one of those claims is now checkable rather than merely stated: the capture path, the storage, and the complete absence of any client that talks to a server of ours are all in this repository.
What you can do with it
- Watch traffic live. Real-time throughput in and out, the hosts talking the most right now, and how many connections are active this session.
- Scroll through your history. Every connection, newest first, with the host, ports, data moved, duration, and whether it was plaintext, encrypted, inspected, or not inspectable. Filter by host, protocol, encryption status, or time range.
- Jump to a moment. A time axis above the history shows activity interval by interval; tap one to narrow the list to it, and keep tapping to zoom in.
- See how a connection was encrypted. The TLS version the server chose and where that reading comes from, what the app offered, the QUIC version, and the server’s certificate when it travels in the clear — each with the caveat that belongs to it, such as that nothing about a certificate was validated. QUIC connections are named too: the host is read from their opening packets, and nothing else is.
- Open a connection. Every packet it carried, titled by what it meant for the connection — opened, accepted, data, delivery confirmed, finished, cut off — with the timing of each one relative to the connection’s first packet.
- Read a single packet. Its headers, decoded into plain terms (endpoints, protocol, sequence and acknowledgment numbers, window), plus the raw bytes as hex and ASCII, ready to copy or share. For a DNS lookup it goes one layer further and tells you the name that was queried and what answered.
- Look inside your own HTTPS. Optional, off by default, and yours to switch on: a connection you inspected shows the exchange decoded, turn by turn. Apps that pin their certificates stay private.
- Export for later. Save any capture as a standard
.pcapfile to open in Wireshark ortcpdump, or export your connection list as JSON. - Audit an app. Named sessions, an allowlist of expected domains, markers, findings, a comparison between two versions and an exportable evidence bundle with a PDF report. Described below.
- Keep storage in check. Set how long history is kept and how large captures may grow; the limits are enforced while monitoring runs, not only while you are looking. The captures list tells you the room left against those limits and when the oldest one expires.
Getting it on your phone
Since there is no App Store listing, you build it yourself. docs/BUILDING.md is the full guide; the shape of it:
git clone https://github.com/juanmmm21/TunnelVision.git
cd TunnelVision
Tools/set-bundle-prefix.sh com.yourname   # the bundle IDs here belong to another account
export DEVELOPMENT_TEAM=YOURTEAMID
xcodegen generate && open TunnelVision.xcodeproj
Be aware of one real cost before you start: the packet tunnel needs a paid Apple Developer Program membership. The Network Extension entitlement cannot be provisioned by a free personal team — that is Apple’s constraint, not ours. A free Apple ID is enough to read the code and run the full test suite in the Simulator, but not to run the tunnel on a device.
How to use it
- Start monitoring. Open TunnelVision — a short introduction explains what it does and what it will ask for — and tap Start monitoring. iOS will ask you to allow a VPN configuration; this is how on-device traffic monitoring works on iPhone, and it stays entirely local. The dashboard starts filling in immediately.
- Explore. Watch the live throughput, scroll the timeline, and tap any connection to open it, then any packet to see its bytes.
- Look inside HTTPS (optional). Go to Settings → set up secure traffic inspection. The app generates a certificate, hands you the profile, and walks you step by step through installing it and enabling trust in Settings → General → VPN & Device Management and Certificate Trust Settings — telling you in advance about the warnings iOS will show. Apps that pin their certificates stay private.
- Export. Share a capture as
.pcapfrom Captures, or export your connection list as JSON — you see how much it contains before anything is shared.
You can stop monitoring at any time, and you can regenerate or remove the inspection certificate from inside the app or from iOS Settings whenever you like.
Auditing an app
The Audit tab turns a capture into evidence about one app. It was built around the network part of a security assessment against BSI TR-03161 — the review a digital health app (DiGA) goes through in Germany, usually done by hand with a desktop proxy — but nothing in it is specific to health apps.
- Create a project for the app: its name, optionally its bundle identifier, and an allowlist of the domains it is expected to contact (
api.example.com, or*.example.comfor every subdomain). - Record a baseline before installing the app. The tunnel sees packets, not processes, so it cannot tell which app opened a connection; the baseline is how the device’s own background traffic is told apart from the app’s. That is the method, and the report states it.
- Record an audit session for each version and build, using only that app while it records. Place markers as you go — Consent given, Logged in, Logged out, or one you name — from the session screen, or without leaving the app under test: from Control Center or the Action Button (iOS 18), Shortcuts or Siri.
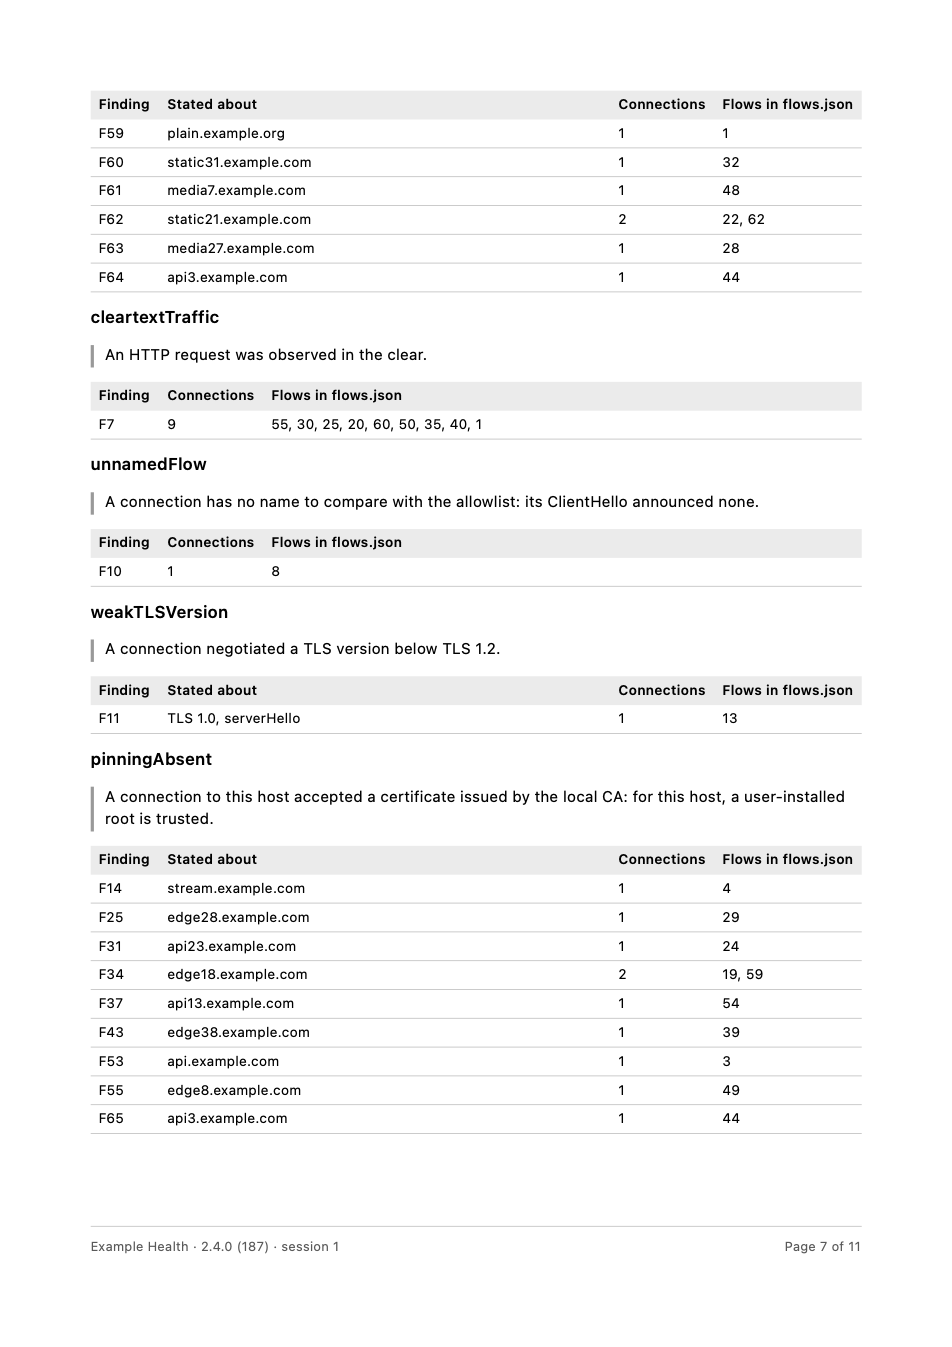
- Read what it found. Each connection of the session is checked for five things: the TLS version against the minimum of BSI TR-02102-2, an HTTP request seen in the clear, a host outside the allowlist (or a connection with no name to compare), whether the app accepted or refused a user-installed certificate, and activity before the consent marker.
- Compare two versions. From an ended session, Compare with shows the domains the later version contacted and the earlier did not, the ones it stopped contacting, and where the TLS version changed — with only the new domains the allowlist does not cover marked for attention.
- Export the evidence. One archive of eight files:
session.json,flows.jsonandflows.csv,findings.json,capture.pcapngwith every packet annotated with its flow and findings,capture.jsonsaying what the capture does and does not hold,report.pdf, and amanifest.jsonwith a SHA-256 of each. The app shows what the bundle contains — and what is missing from the capture — before the share sheet opens.
A sample report, written from the synthetic capture this repository’s tests use, shows what an assessor receives. One page of it:
What it deliberately does not do matters as much as what it does:
- It never says a requirement is met. A verdict states what the recorded traffic showed, within what the tool looks at for that requirement. A requirement with no applicable observation is reported as not assessed by this tool — never as passed. The assessment is the assessor’s.
- It never defeats pinning to find out more. The pinning check is read from what already happened: an app that refused TunnelVision’s certificate pins (or rejects every user-installed root); one that accepted it trusts user-installed roots. Nothing is bypassed, for an audit or for anything else (ADR 0003).
- Decrypted content is not in the bundle. The capture holds each packet as it crossed the tunnel — encrypted where it was encrypted. What travelled in the clear is readable in it, and the app says so before you share.
- The requirement identifiers are not written from memory. The catalogue is a versioned JSON checked against the official documents (TR-03161-1 version 3.0 and TR-02102-2), and it records the SHA-256 of the PDFs it was checked against.
The model is specified in docs/spec/audit.md, the screens in docs/ux/audit.md, and the scope in ADR 0008.
What you need
- An iPhone running iOS 17 or later. (iPad is not supported: every screen was designed and measured for the phone, and shipping an iPad layout nobody has looked at would be worse than not offering one.)
- A Mac with Xcode 16+ and a paid Apple Developer account, to build and install it.
- Looking inside HTTPS additionally asks you to install a certificate profile — an in-app, guided, fully reversible step.
How it works
TunnelVision uses Apple’s built-in NetworkExtension framework to run a small, local VPN — one that ends on your own phone instead of forwarding to a company’s server somewhere. Your traffic passes through it, TunnelVision records what it sees, and the traffic continues to the internet unchanged. Latency-sensitive traffic such as calls and video streaming is passed straight through so your phone stays fast and your battery is spared.
The interesting engineering is in doing that inside the envelope iOS gives a network extension:
- A userspace TCP/IP path. The extension only ever sees raw IP datagrams. To read or terminate a TCP stream you have to reassemble it yourself — sequence-number ordering, retransmits, out-of-order segments — in a userspace flow table, and then terminate connections in a userspace stack when inspection is on.
- A hard memory ceiling. Network extensions run in a separate process with a small memory budget. Buffers are bounded, captures stream straight to disk as
pcap, and back-pressure drops rather than grows. - Cheap IPC to the UI. The extension and the app are different processes. Packet metadata reaches the UI through a bounded ring buffer in a memory-mapped file in the shared App Group container, with a Darwin notification used only as a “data available” wakeup — never as a data channel.
- Reading a name out of QUIC without decrypting QUIC. A QUIC connection’s first packets are protected with keys derived from values that travel in those same packets (RFC 9001), so the host the client asks for can be read from them — and only that: the client’s opening packets, its ClientHello, nothing after.
- Throughput-first persistence. History goes to SQLite (via GRDB) rather than Core Data or SwiftData, because the write pattern is thousands of small append-only rows per second.
docs/ARCHITECTURE.md covers the whole picture, docs/spec/ documents each module with its actual Swift interfaces, and docs/decisions/ records why the load-bearing choices were made.
The code
| Path | What lives there |
|---|---|
TunnelVision/ |
The SwiftUI app: views, view models, services |
PacketTunnel/ |
The NEPacketTunnelProvider extension: flow table, TCP reassembly, TLS termination, relay |
AuditControls/ |
The Control Center control that places an audit marker without opening the app |
Shared/ |
Framework linked by both: models, persistence, IPC ring buffer, pcap, IP and QUIC parsing, TLS primitives, the audit model and the evidence bundle |
CTVAtomics/, CTVResolv/ |
Small C shims — C11 atomics for the ring buffer, <resolv.h> for the system’s DNS servers. Both exist because Swift cannot reach those APIs on iOS |
TunnelVisionTests/ |
The unit tests — about 2,900, all runnable on the Simulator |
Tools/ |
Bundle-prefix script, screenshot driver, app icon renderer |
docs/ |
Architecture, module specs, UX specs, decision records |
Swift 6 with strict concurrency throughout. The Xcode project is generated from project.yml with XcodeGen and is not committed. CONTRIBUTING.md has the house rules; CHANGELOG.md has the history.
Questions
- Why isn’t it on the App Store? Guideline 5.4 requires a company developer account for any app that ships a packet tunnel, and this one was submitted by an individual. The app itself was not faulted. The full story.
- Why does it need VPN permission? Capturing traffic on iOS is only possible through a VPN interface. TunnelVision’s is local-only — your data is not routed to TunnelVision or anyone else.
- Does my data go anywhere? No. Everything stays on your device, and the source here is the proof.
- Do I really need a paid Apple account? To run the tunnel on your phone, yes — the Network Extension entitlement is not available to free personal teams. To read the code and run the tests, no.
- An app’s HTTPS shows “not inspectable” — is something broken? No. That app pins its certificates, and TunnelVision intentionally leaves it alone rather than interfering with its security.
- Does an audit with TunnelVision certify an app against TR-03161? No. It produces evidence about the network part of an assessment — what was contacted, how it was encrypted, when — for an assessor to judge. It covers the requirements a network capture can speak to and reports the rest as not assessed.
- A packet says its bytes are gone. Why? Either the capture was set to keep headers only, which you can change in Settings, or the capture file it lived in has been deleted. The connection itself stays in your history either way.
- Will it drain my battery? It is built to be light: streaming and call traffic is passed through without heavy processing, and captures are written straight to storage instead of piling up in memory.
Privacy
TunnelVision collects nothing and has no server to collect it to. The full policy is at Privacy Policy — short version: everything stays on your device, nothing is sold, used, or disclosed to anyone, and the only way any of it leaves your phone is if you share a file yourself.
License
Released under the MIT License. © 2026 juanmmm21.